Seafoam Islands
| Pokemon | Type | Entrance | B1F | B2F | B3F | B4F |
|---|---|---|---|---|---|---|
| Zubat | Poison/Flying | X | X | X | X | X |
| Golbat | Poison/Flying | X | X | X | X | X |
| Slowpoke | Water/Psychic | X | X | |||
| Krabby | Water | X | X | X | X | X |
| Kingler | Water | X | X | X | ||
| Seel | Water | X | X | X | X | |
| Staryu | Water | X |
| Pokemon | Type | Surfing | Fishing |
|---|---|---|---|
| Krabby | Water | X | |
| Kingler | Water | X | |
| Poliwag | Water | X | |
| Goldeen | Water | X | |
| Horsea | Water | X | |
| Staryu | Water | X | X |
| Tentacool | Water/Poison | X | X |
Seafoam Islands is a five-leveled cave. There are no Trainers, but you will need to solve a puzzle of sorts using a Pokemon to push boulders with HM04 Strength. The Pokemon you encounter while walking on land and surfing on the water will vary from floor to floor and version of the game. To make things easier, I listed all the wild Pokemon at the top of the page, and the walkthrough will jump from floor to floor below.
The entrance is a very simple room. There are two boulders next to two holes. One hole is located to the east of the entrance, and the other hole is located further north east over the hill. Have a Pokemon use Strength to push these boulders into the holes below.
Take the ladder at the far northeast side of the first floor. This will take you down to a secluded area on B1F. Push the boulder in this area down another hole to the basement before.
Return to the first floor and take the ladder to the west; this will take you back down to B1F. Walk down the set of steps to the south, then walk up the nearby set of steps to the east. Follow the hill to the northeast down another set of steps where another boulder should be. Use Strength to push this boulder down the hole.
Walk back up the hill, walk southwest down the steps, and then walk northwest to a ladder in the corner of the floor. Take this ladder down to B2F. Walk east to find another boulder. Actually, this is the same boulder from the beginning, you’ve just been pushing it down several floors. Push it down another hole to the floor below.
Return to the floor above through the same ladder to the west. Now that you’re back on B1F, walk all the way south, walk east up the hill, down the hill once again to the east, and down the ladder to the next floor.
You’ll now be on B2F. This next step is simple: Walk west until you find another ladder down to B3F.
To the south are several boulders. Walk east, down the hill to the south, and west to these four boulders. It’s a bit of a puzzle to solve them. First, walk towards the two boulders on the left. Push the nearest boulder all the way west to access the second boulder, then push the second boulder down into the hole.
Next, walk towards the two boulders on the right. Push the boulder on the right all the way upward to access the other boulder from above. Push this last boulder down once, to the left twice, and down once into the hole.
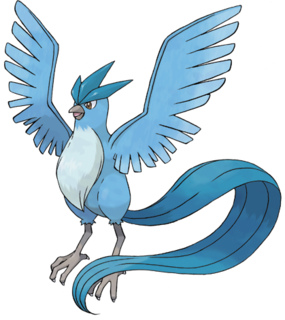
Return up the hill to the north and take the northernmost ladder down a level to the fourth basement. This is where you can find another legendary Pokemon! Walk to the body of water to the southwest, and then surf on a Pokemon to the north. The ice beast will be waiting on a small island.
Legendary Pokemon: Articuno

| Pokemon | Level | Type | Moves |
|---|---|---|---|
| Articuno | 50 | Ice/Flying | Ice Beam, Peck |
Articuno is a Legendary Pokemon. That means there is only one in the entire game, and it’s incredibly powerful. Make sure you have a ton of Ultra Balls before battle. The goal is to reduce its health as much as possible without making it faint. To increase your chances of capturing this monster, inflict the sleep status condition. Of course, it might be a little tough to do so since most Pokemon that inflict sleep are grass-types who are all weak to Aricuno’s Peck and Ice Beam. With all the previous requirements met, start chucking a ton of Ultra Balls until one finally captures the legendary beast. If all your Pokemon faint, or if your run out of Poke Balls, restart your game and try again.
After the battle, return to the previous land mass to the south. Instead of going down the same ladder you just came from, walk to the northeast to find another ladder. Take this ladder up a floor, and take the next ladder up another level. You should find one last boulder here. Push it down the hole to block up the raging river.
To make things quick, jump down the same hole you just pushed a boulder into. You should land in the river on B3F. Surf a short distance southeast until you find some steps leading up the hill. Take the ladder to the south up another level to B2F. Take a series of ladders nearby until you reach the first floor. The exit will be on the south side.

