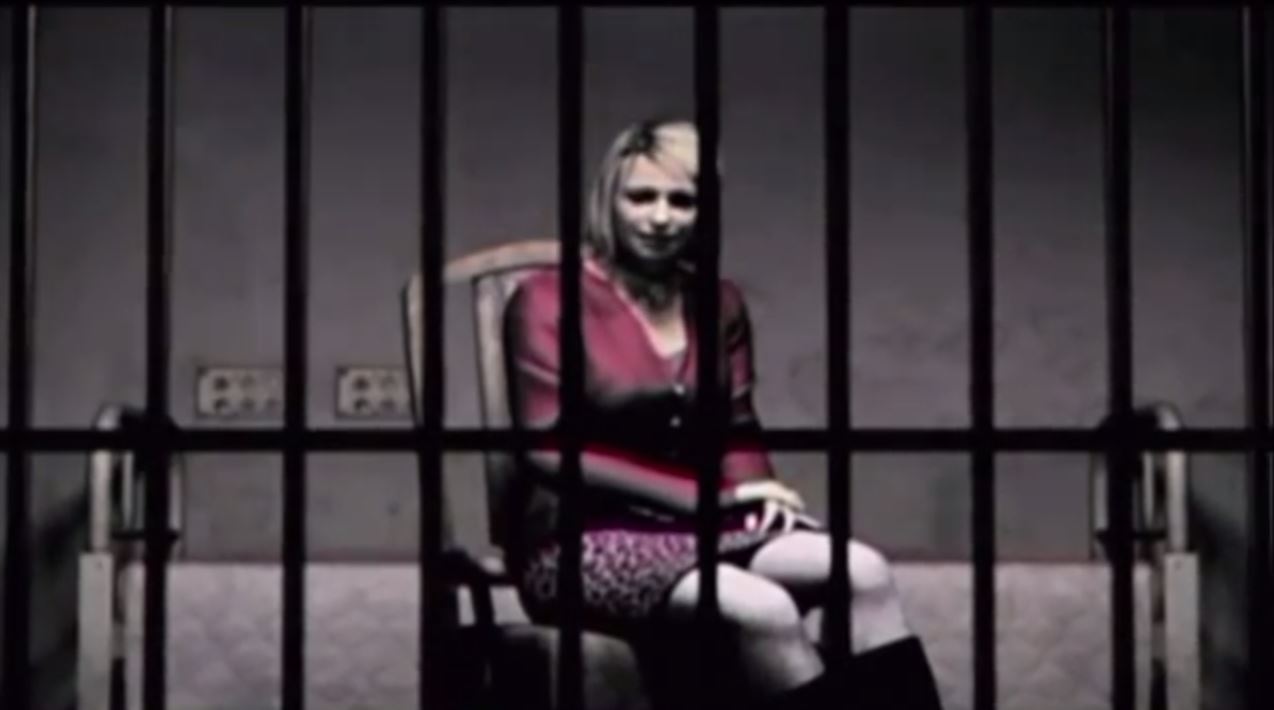
Lake View Hotel
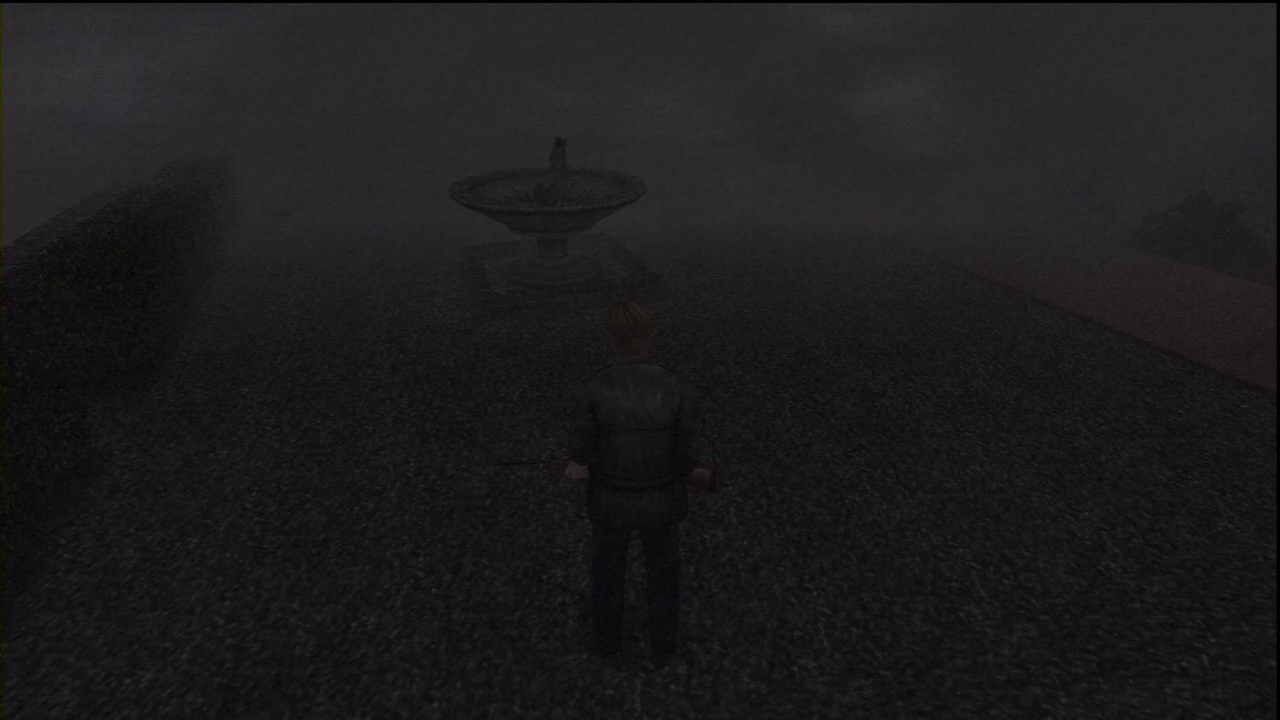
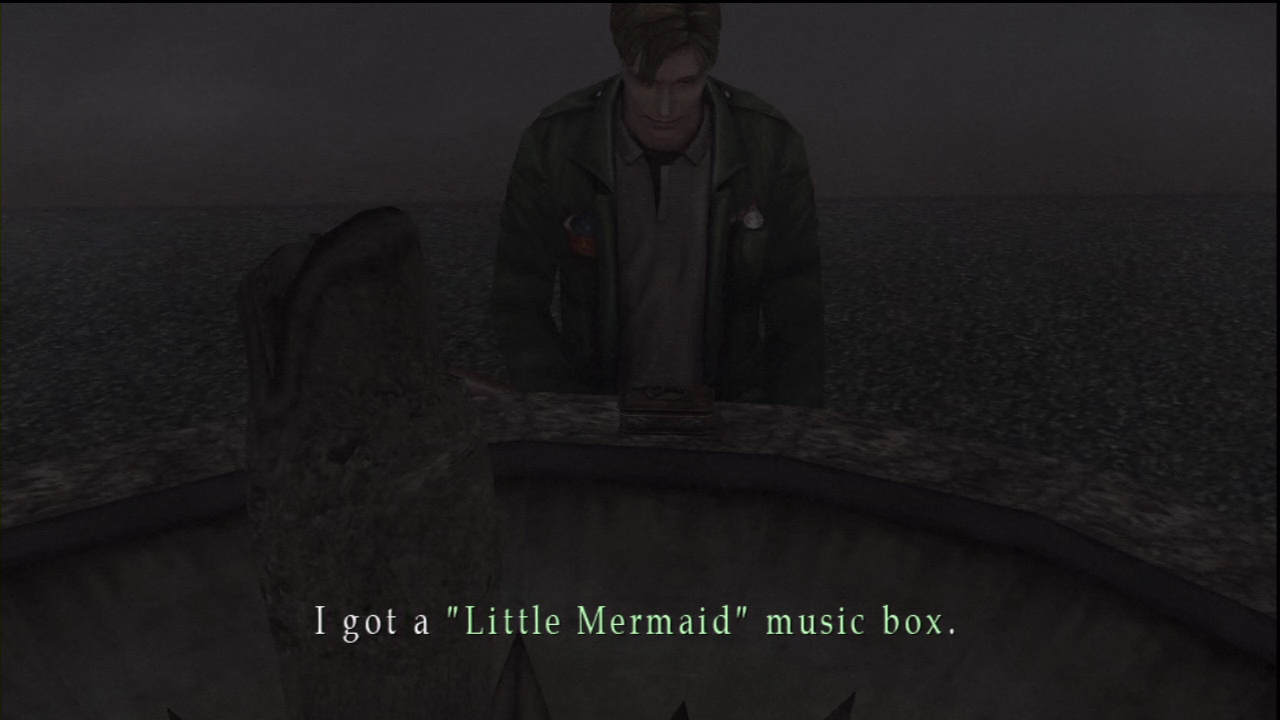
Walk up from the dock and head towards the Hotel, but don’t enter just yet. Walk to the fountain on the left and pick up the “Little Mermaid” music box.
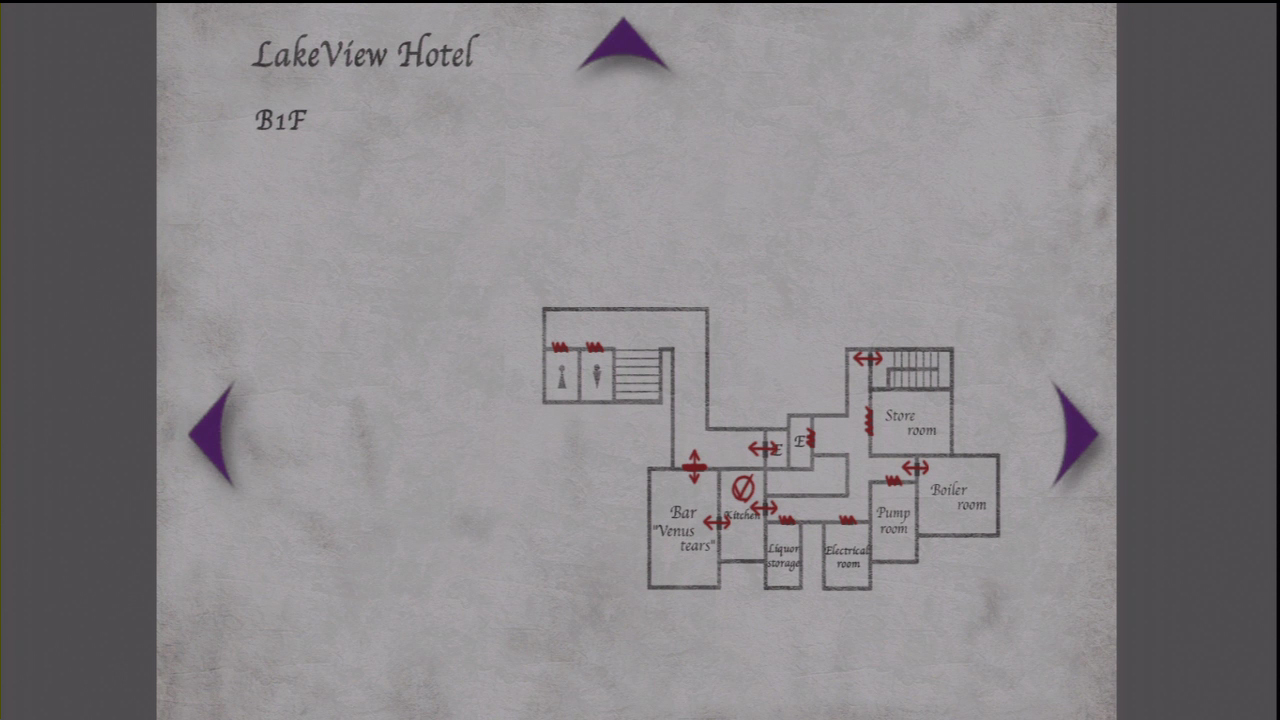
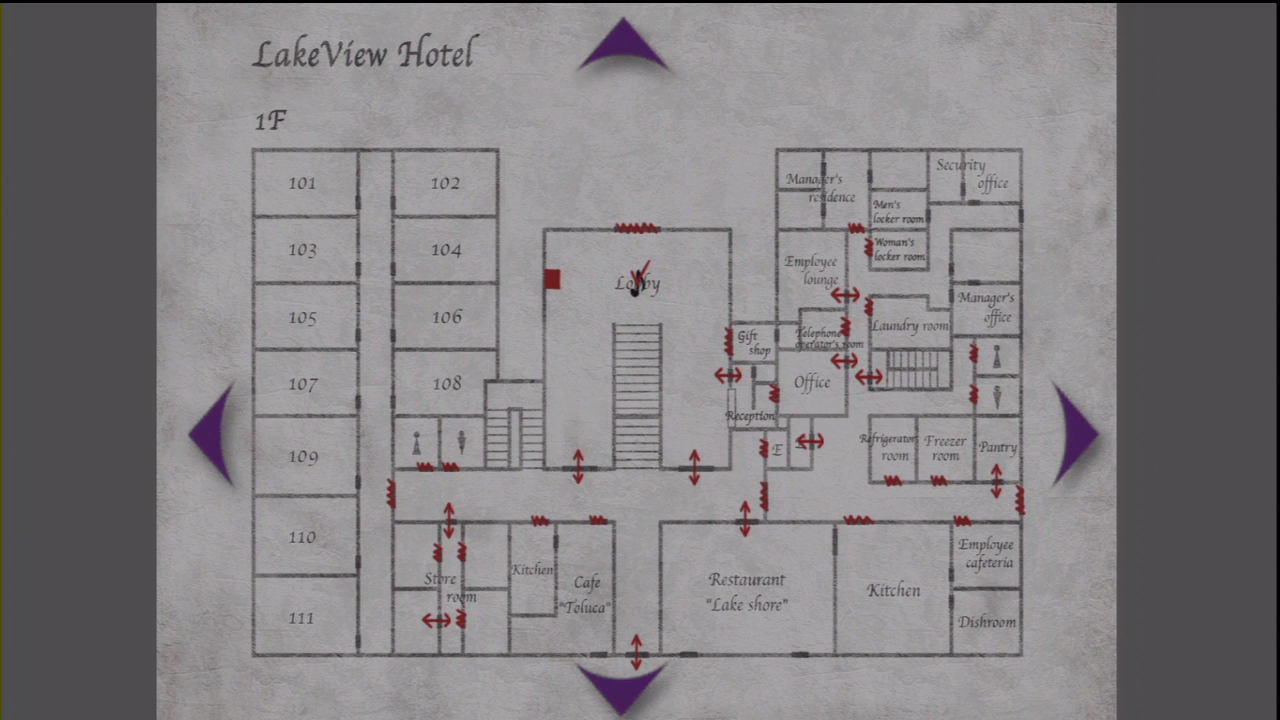
As soon as you enter the hotel, look to your left to find the hotel map (for guests). Here’s the map completely filled out:
With map in hand, head straight ahead and go down the stairs.
Basement – First Floor
Walk to the elevator on the far east side and collect the can of Thinner. Head back up to the first floor.
First Floor
Hall West of Cafe Toluca
Enter the door West of the Cafe “Toluca.” Through the door is a tight hallway with a Mannequin or two at the end. Kill them and enter the door at the end of the hall. Inside the small supply closet are three boxes of Handgun Bullets and a box of Rifle Shells.
Restaurant Lake Shore
Enter the restaurant to find the “Fish” Key on the table with a plate. Approach the piano to play a cut scene.
The hall outside will now have two Abstract Daddys in it. These Abstract Daddys are much weaker than the one from earlier.
Lobby
Walk through the door on the left or right side of the stairs to enter the lobby.
You can find a Save Square on a chair in the North Eastern corner of the room, to the left of the Music Box.
Go to the Eastern part of the room to find the Reception Desk. A letter will be at the desk directing you to the location of a videotape. Enter the door to the left of the desk to go behind the desk. Check the key boxes to find the Key to Room 312. It’s the room James and Mary stood in three years ago. It’s also the room marked on the map that says “Waiting for you…”
Next, head up the stairs in the lobby to the second floor.
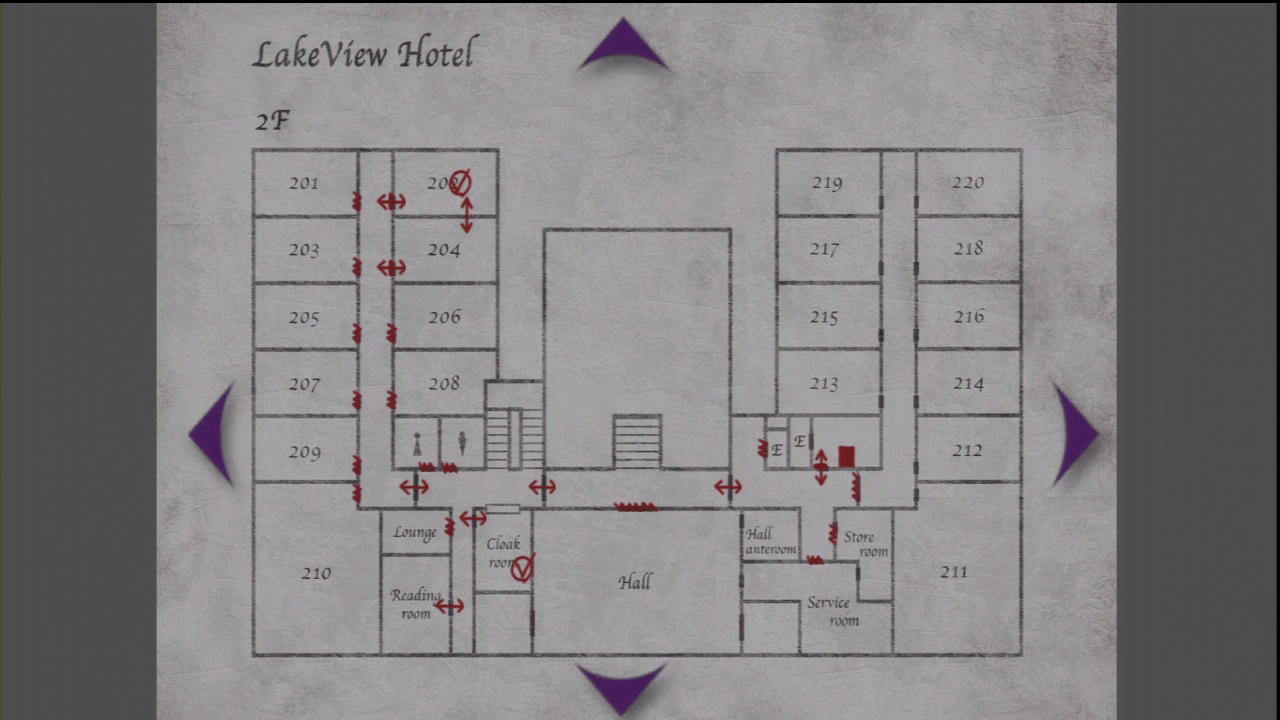
Second Floor
Take the western (left) door at the top of the stairs Your first stop should be the Cloak Room. Before entering, check the desk at the end of the hall for two boxes of Handgun Bullets.
Cloak Room
The Cloak Room has many useful items. You can find a First-Aid Kit on the counter, two boxes of Shotgun Shells on the back shelves, and two boxes of Handgun Bullets near the shotgun shells.
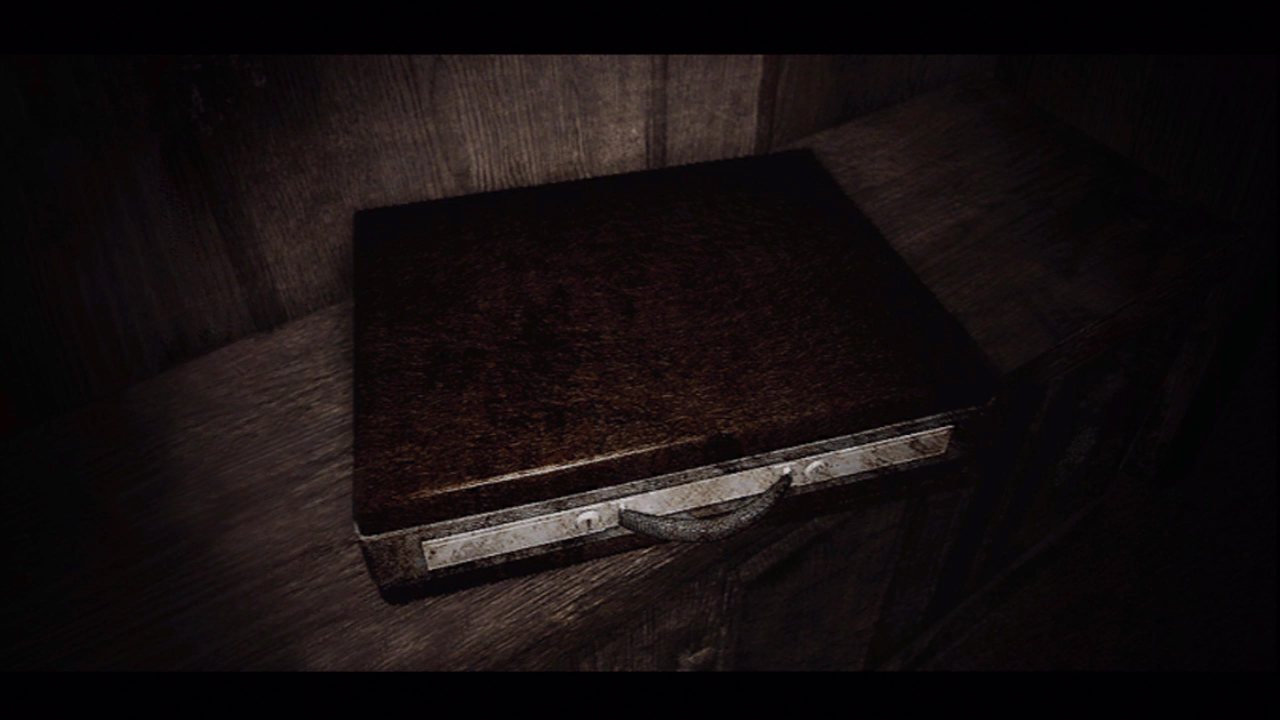
The most important thing in this room is the Briefcase. Use the “Fish” key to open it and receive the Key to Hotel Room 204.
Reading Room
The Reading Room contains a Health Drink on a table and two boxes of Shotgun Shells on two book shelves.
Exit out of the Reading Room and head to the Western hotel room hall. There will be an Abstract Daddy here, so be prepared. Enter room 204.
Room 204
Use the Key to Hotel Room 204 to open it up. On a desk will be the Employee Elevator Key.
Walk to the wall on the left to find a huge hole. This allows you to easily enter Room 202.
Room 202
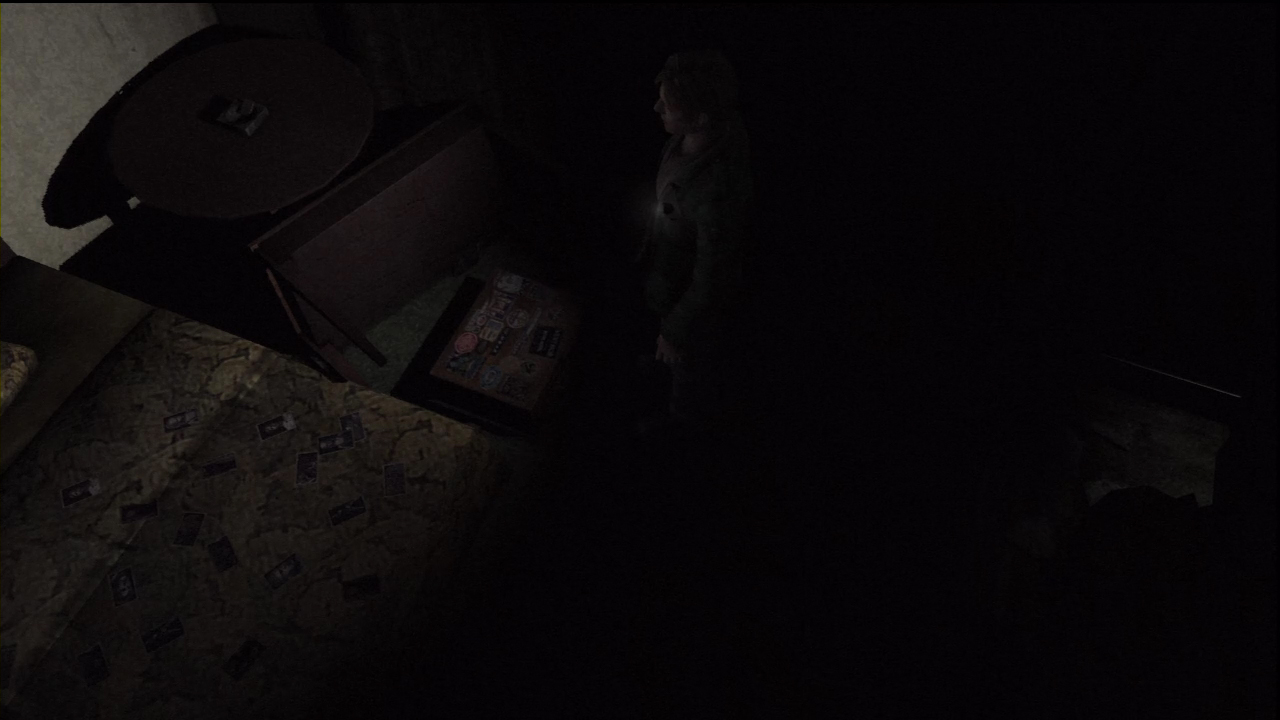
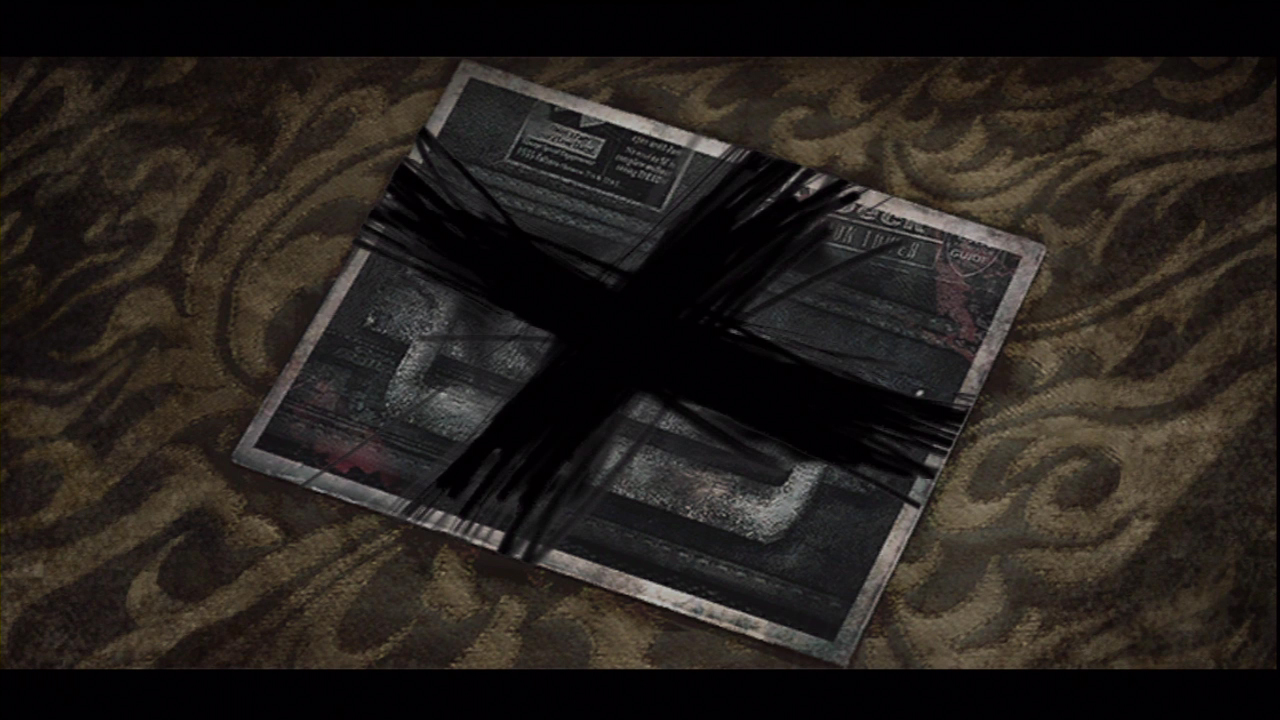
Inside Room 202 is a briefcase on the ground and multiple photos all over the bed. Investigate the photos to find one with a black X on it. Use the Thinner here to remove the black X and find the code to the suitcase. Use the code to open up the suitcase and receive “Cinderella” music box.
Lobby (2F)
Go back to the Lobby, but stay on the second floor near the stair case. This time, take the Eastern door to the other side of the hotel.
Immediately to the left is a Health Drink and a box of Rifle Shells on two tables. Head down the hall and use the Employee Elevator Key on the door marked “Private.”
Hotel Elevator Hall
Enter this room and you will find two Health Drinks on a Janitor’s Cart. Look on the other wall to find a Save Square.
Walk into the elevator and an alarm will go off. Investigate the buttons to see the max allowance is one person. Walk over to the shelf next to the elevator and put everything inside. You can’t have anything on you or the elevator won’t work. The only things you really do get to keep are your maps.
With everything safely stored, take the elevator down to the first floor.
First Floor
You will now be in the Employee section of the hotel. On James’ left is a bulletin board with the hotel map (for employees). This will fill in all sections missing on the earlier map. Since you don’t have your flashlight now, you won’t be able to read your map outside of well lit areas.
Pantry
The first stop should be the Pantry. You can find it by looking for a red light over the door. Inside is the “Snow White” music box.
Office
The next place you should stop is the office. It’s the door to the right of the Elevator. Inside is a Videotape and a Can Opener inside of an open safe.
Employee Lounge
The last room to check out is the Employee Lounge. On top of the refrigerator are two boxes of Rifle Shells.
Stairway
To return to the guests portion of the hotel, take the stairway south of the laundry room down into the Basement. The basement is too dark to read the map, so use the map at the top of the page to find your way.
Basement First Floor
This Basement’s hallway will have two Mannequins, so look out. There are two rooms you can enter from the dark hallway.
Boiler Room
Enter the Boiler Room to find the Bar Key hanging from a boiler. There’s also a First-Aid Kit on the floor.
Kitchen
Enter the kitchen to find three Health Drink on two counters. There is also an unlabeled can on one of the other counters. Use the Can Opener you grabbed from the safe to receive a Light Bulb. Light Bulbs in a can? Is this a Japanese thing or a video game thing?
Use the next door to enter the Bar.
Bar Venus Tears
Head around the counter to find the door outside of the bar. If you try to exit the bar, you won’t be able to find the keyhole. Look on the bar for a lamp without a light bulb. Use the Light Bulb here to illuminate the area. Now you can use the Bar Key and exit the bar.
Go and collect the belongings you left on the Second Floor, in the Hotel Elevator Hall. Beware of the Mannequins in this first hall.
Lobby
Once you have reclaimed your belongings head to the Music Box. You’ll need to use all three music boxes to solve the puzzle. If you have trouble figuring out which slots the boxes go in, see the Riddle and Puzzle Solutions page.
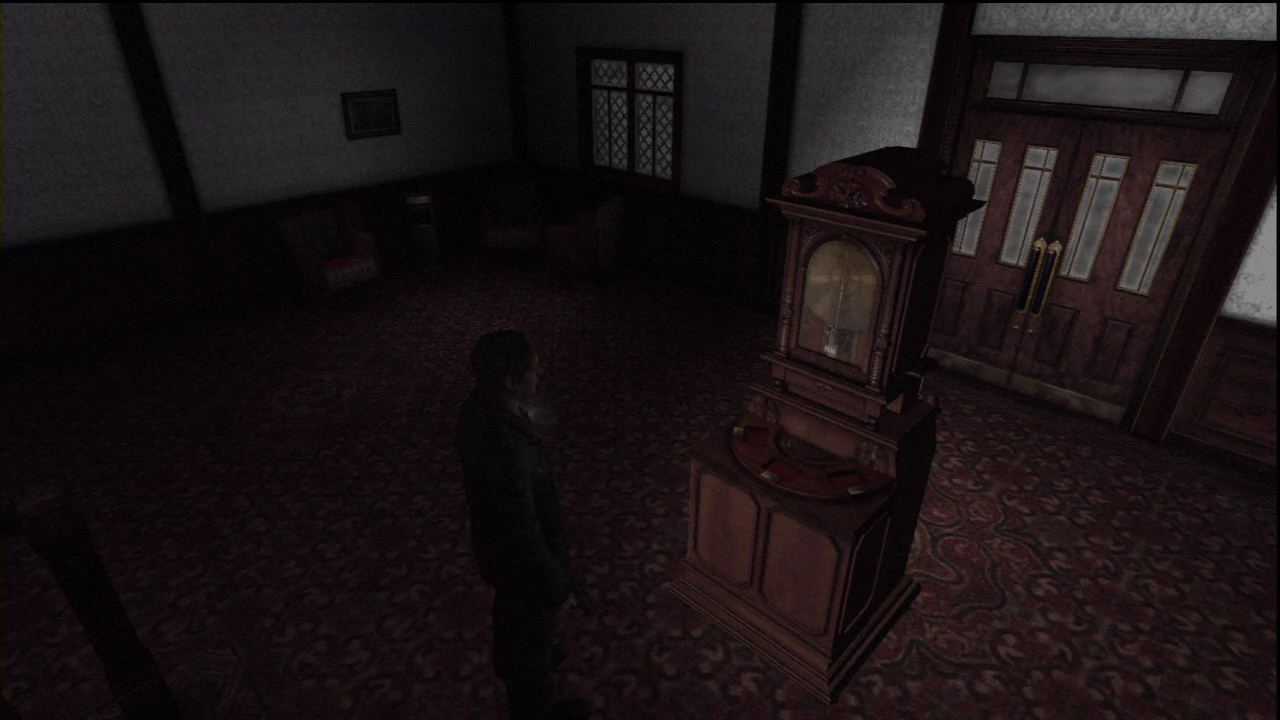
Solving the puzzle will present you with the Hotel Stairway Key. Grab it from the music box, now we can head to the third floor. Go up the lobby stairs and out the Western door. There is a staircase headed up immediately on James’ right on the second floor, take it up and use the Hotel Stairway Key on the metal gate.
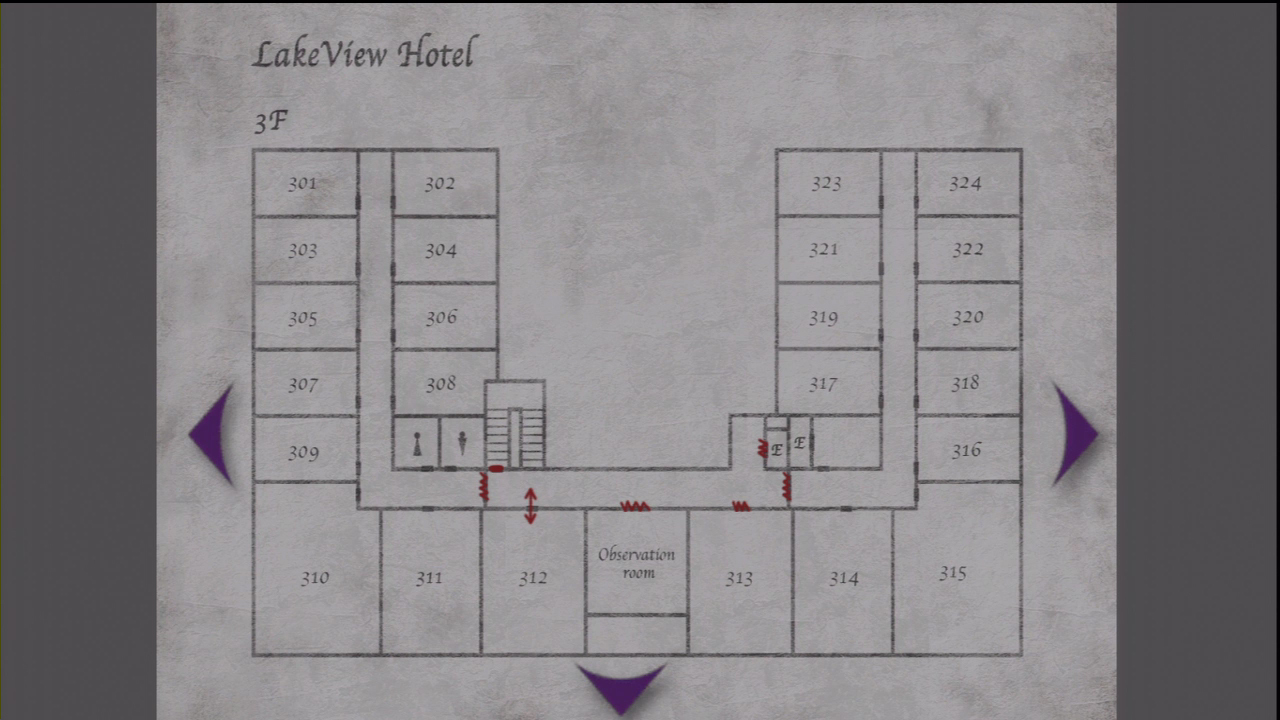
Third Floor
Room 312
Enter Room 312 with the Key to Room 312.
If you are trying for the UFO Ending, this is the final place to use the Blue Gem. Stand next to the window and use it to reveal the ending. This MUST be done before viewing the videotape!
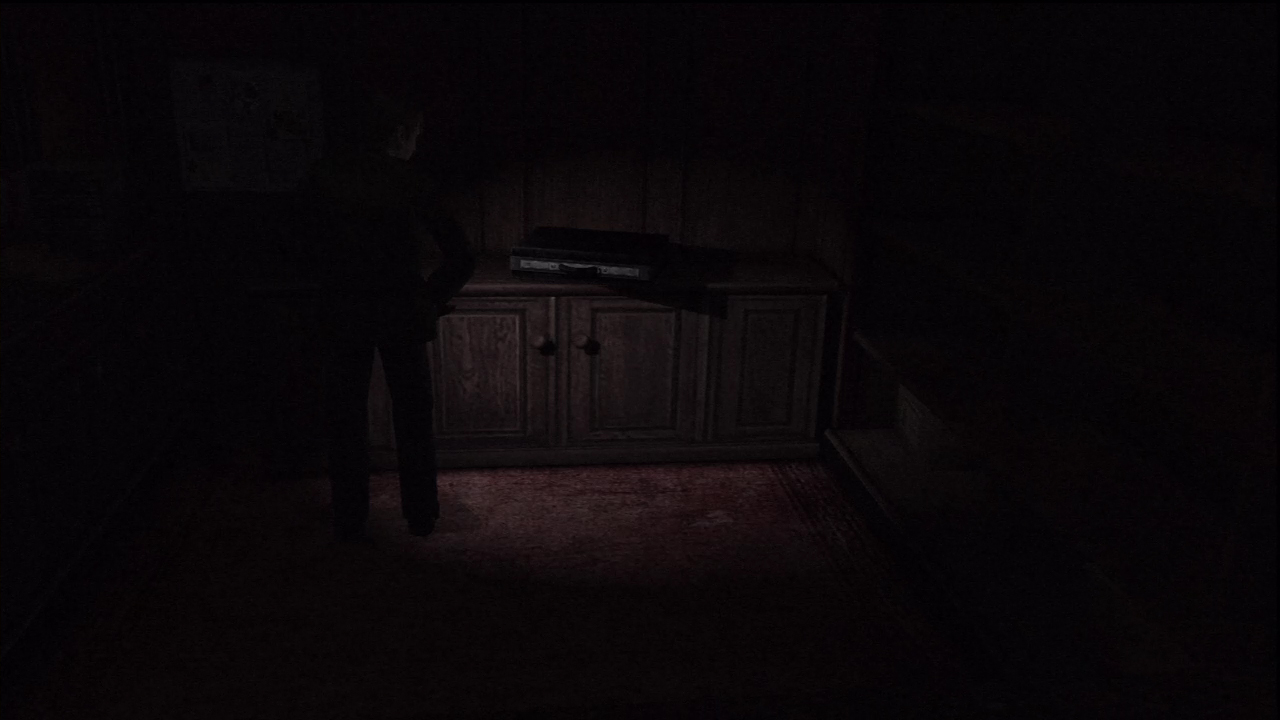
Head to the television by the window. Use the Videotape while standing in front of the VCR to see what’s on it. After the brief cut scene, James will come to realize what exactly happened to Mary, and the hotel will shift into The Otherworld.