
Toxic Swamp
Score Challenges:
Score 220,000 Points
Score 320,000 Points
Score 360,000 Points
-Award:Hand Cannons
Reward Challenges:
Collect 10 red skulls
-Award:Golden Arrow of Tezcatlipoca
Clear the maze without taking any poison damage
-Award:Stone Lizard
Heal the rolling ball
-Award:Health Powerup
Get the spinning ball into the fire pit in :30 or less
-Award:Ammo Powerup
Reach the exit in 9:00 or less
-Award:Gold Arrow
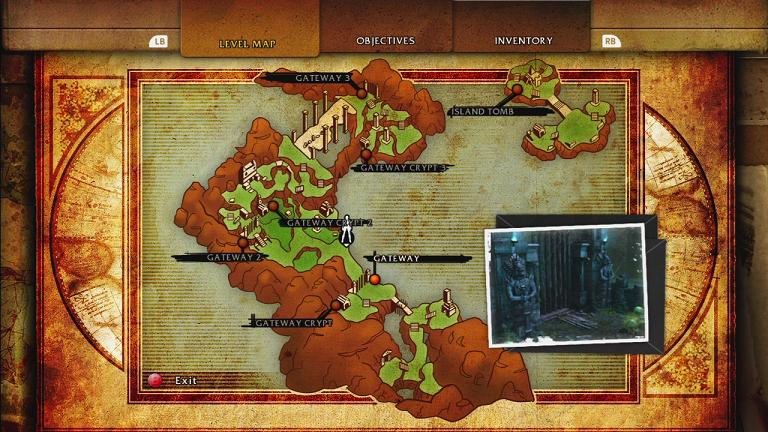
This level comes with it’s own map just like a past level. Use it to help you out if you get lost! Look out for these pods:
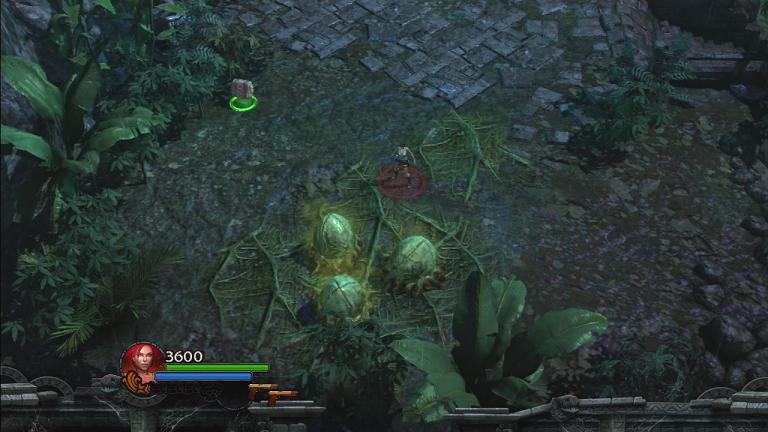
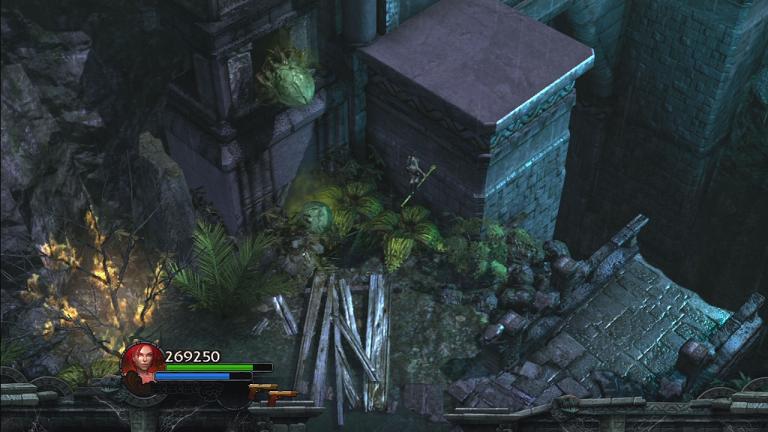
If you touch them or shoot them they’ll explode and hurt you. You’ll find a few gems down from the start of the level. Walk down the stairs to the right and you’ll find more gems to the downard right next to more pods. Continue on by walking past some pods in the up right direction. Walk fast so the pods don’t explode with you in them. If you shoot them and try to walk past them then the poison dust will hurt you. Walk up and you’ll find some gator looking enemies you have to take out. Watch out where you shoot because of the exploding pods. You can use them to your advantage. Walk up some stairs and you’ll find a red skull on top of some more pods. Try to jump over the pods to get the skull.Next head to the right up some stairs. You’ll find a tomb and more gators in the front. Take them out and circle the tomb to find some gems. At the top is a red skull. Use your spear to get to the first level of the top and jump up the next steps:
Behind the tomb is a ladder to three gems. You can try to jump to the ladder from the tomb and over the pod, chances are you may get injured. Now head inside the tomb. In the tomb you’ll find many gems. To the left you’ll see a fire pit and to the right you’ll find the steel ball you can place in the pit to progress. The ball is spinning on a poll. Use a bomb to take it off the poll. To get it up the next level you’ll have to roll it into the three pods which will explode and shoot it up to the next level. Roll it into the fire pit and grab the artifact, the stone feather. Go back to the fork in the road and take the left path this time. When you go left you’ll get a small cut scene and have to face a few enemies. Watch out for the pods and use them to your advantage. After you defeat them head left and up a path to reach a tomb. Inside is a new weapon, the grenade launcher! Use it to destroy the object wheels in your way to the top/right. There is also an ammo cache in the corner of the room.
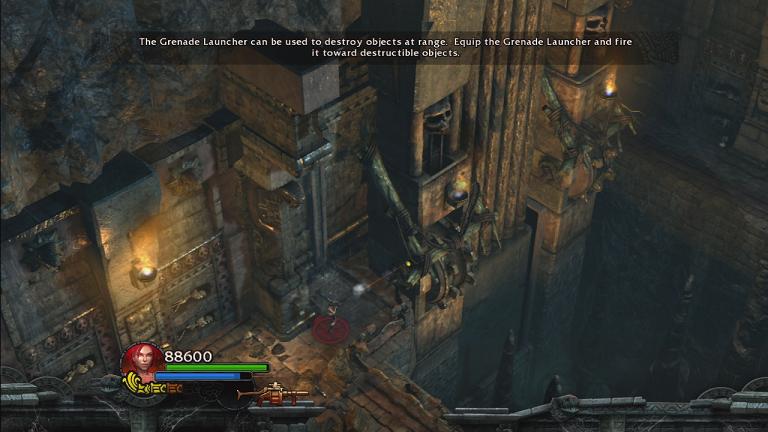
Shoot the two wheels and the gate outside will open. Go through the newly opened gate to progress.
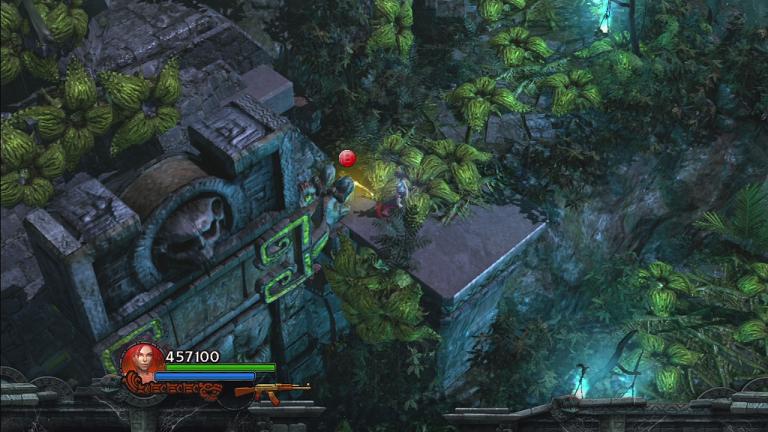
On the other side you’ll run into a few more gators and human like enemies. The green human like enemies will explode into poison dust like the pods so look out. The poison pond to your left had a red skull in the middle on a column. If you touch the water you will be hurt so we’ll have to look for some other way. Continue to the left and you’ll face a giant enemy with a few small guys around him. Once you defeat him all the water will drain out of the map. It will still be tough to reach the red skull since it’s surrounded by pods. Throw some spears on it at and you’ll reach the top
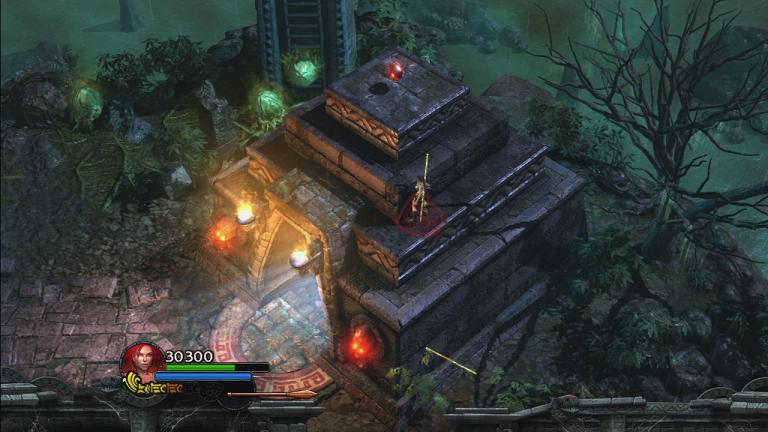
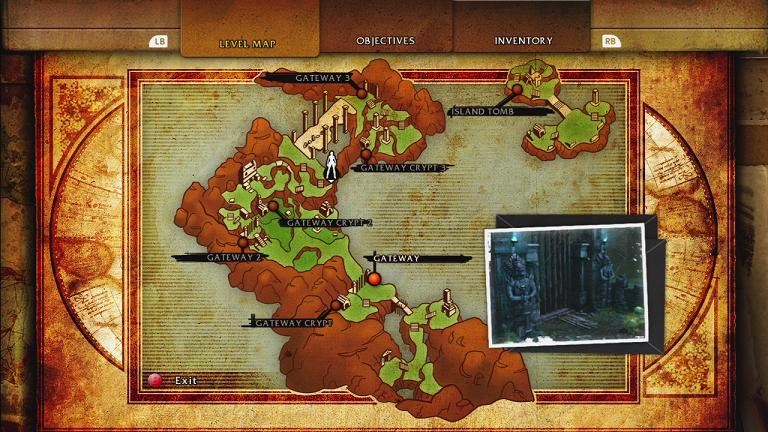
Next you’ll want to head towards the area above the y in way in “Gateway Crypt 2” on your map. You can find some gems along the way. You should see a tall structure with a ladder on the side. Climb up it to find another red skull and a few gems. Now head to the crypt and grab the red skull on the top by placing a spear on the side and climbing up. Just like before. Inside the crypt is a ball surrounded by steel arrows. You can reach it so you’ll have to use your grenade launcher.
There’s an ammo cache in the left corner of the room if you run out of ammo. Once you get it in go to the right side of the room to find the relic Three Arrows of Tezcatlipoca.
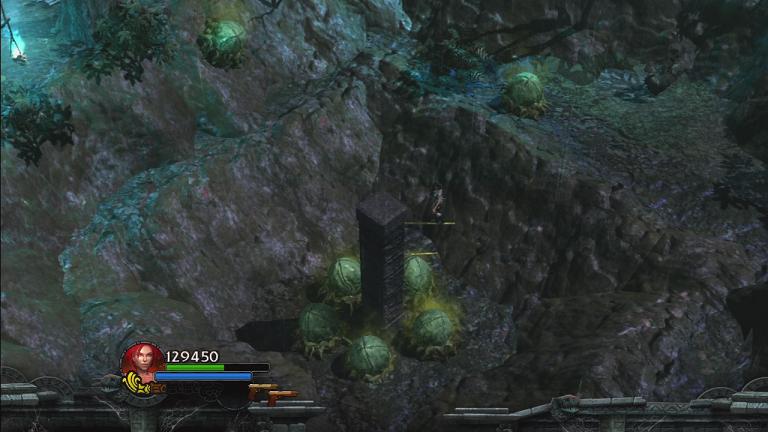
After that you’ll want to head to the area marked “Gateway Crypt 2” on your map by the red dot. You can find some gems in the dried up lake bed along with tons of enemies. At the back of the lake bed you’ll find a steel ball. You’ll have to heal the ball to complete a challenge. To do that you’ll have to use two bombs to push it up from the lake bed. Rolling it up the ramps isn’t good enough. Then take it to this location:
There will be a health shrine which you can use to get the challenge. Next head to the gateway crypt and enter. It’s a pretty straight forward maze. There’s isn’t a certain direction you must take because they all end up connecting. Try not to get poisoned so you can earn another artifact. You’ll face a few giant enemies inside. At the end of the maze you’ll have to step on a pressure plate that’s partially surrounded by three pods. Step on it and then enter the newly opened gate. There will be two more pressure plates. Step on one and shoot one of the wheels shown with a grenade launcher. Step on the other and shoot the other wheel. This will open the gate inside the maze to reach the area you started in. It also opens the gate outside the crypt.
Exit the crypt and enter through the opened gate. You’ll face a few human like enemies that shoot fire balls or whatever at you. You should also find a few gems along the way. Walk up the path to a stone bridge and shoot a spear across the way so you can reach the other side like shown below:

When you reach the other side you’ll face a few more poison enemies. To the left is a red skull and some gems. Once you grab the red skull a giant enemy will come down from the sky and face you. Take him out but watch out for the pods. He’ll shoot giant fire/plasma balls at you. When you’re done with him head to the right to find a broken bridge. To the left of the bridge is a cement platform:
Use your spears to climb on top of the structure. You must shoot the pods and use your grapple hook to get across. Try and get the health upgrade too. Be quick because they will grow back. You will have to run into their poison spores but the health upgrade will heal you along the way. At the other end is a easy to navigate path. There will be some poison pods along the way so look out. Head all the way to the right and up a set of stairs to find another red skull and some gems. Look here on the map to find exactly where it is:
Climb up the stairs and reach the last set of stairs. Once you reach the bridge, spikes will activate and you cannot go back. There’s a ton of holes on the right side of the bridge, but there’s also a red skull on that side. Choose the left side first because even if you chose to enter on the right side, you will be placed on the left side after a small camera zoom. Columns will fall over onto the bridge, lightning bolts will hit the barriers, and a few enemies will spawn on the bridge with you. Try and fight your way across the bridge without getting trapped. You can use your spears to jump over the barrier to the left and right side if you wish to switch sides.
At the other side you’ll find a health pack and some stairs leading down to a health shrine and ammo pack. On the way down you’ll get ambushed by a few enemies. Make your way to the third crypt but before you go in, head to the right of the entrance to find another tower with a red skull on top. Climb the ladder to grab it. Now go into the crypt. Inside of the crypt you’ll find two gold handles. When you pull them, two bridges will come down so you have access to shoot two wheels. Those two wheels are like the other wheels earlier in the level that hold a gate. Destroy the wheels and the gate will lower. You only have about one shot by the time you run from one side of the room to the other, so make it count. Watch out for the poison pods. There are four spike pressure plates with 4 gems on top too, so be careful. When you hit both wheels the gate will open. Exit the crypt and head towards the opened area.
Inside this crypt is a spinning ball at the top. Blow it up to gain access to the ball and try to get it in the fire pit in :30 or less to get a challenge completed and an ammo powerup awarded. There are two sets of stairs and two sets of spike pressure plates so be careful not to get skewered. There are also tons of poison pods that the ball will roll over. It may send the ball back at your or just poison you. At the bottom you’ll find a pressure plate among the spike pressure plates. Place the ball there and head back to the top of the crypt. You’ll face two more regular demons and one giant one. Behind the giant one is an artifact that was unlocked until you placed the ball on the pressure plate! It’s a gold owl. Take it and go back to the bottom of the crypt. Place the ball in the fire pit to exit.
On the outside are a few enemies. Nothing big. A few enemies may pop out of the poison pods. Continue along the path and you’ll see it’s a bit of a maze of fallen columns. Head to the right/top area to find the last red skull on top of another tower. When you get off the tower you’ll face a few more poison enemies. Once you’re done there head to the left area to find two wooden bridges. You’ll get a small cutscene. Walk left up some stairs to pull some object on the stature left. Then go around the top to reach a similar object on the right side that you must pull right.
Jump down and stand on the pressure plate. The door will open and a chain reaction of poison pods will explode. Run around the temple again trying to avoid the blast. At the end jump down and into the tomb/temple/crypt to end the level.