
Fiery Depths
Score Challenges:
Score 90,000 Points
Score 110,000 Points
Score 130,000 Points
-Award:Spear of Fire
Reward Challenges:
Collect 10 red skulls
-Award:Golden Shroud of Cihuacoatl
Reach the exit in 5:00 or less
-Award:Dark Drum
Heal the rolling Ball
-Award:Wind Drum
Sacrifice 3 skeletons to the scorpion crest
-Award:Health Powerup
Jump to all 6 spider tile platforms
-Award:Ammo Powerup
At the start of this mission you’ll get the usual ammo and health pack. Take a few steps forwards for a cutscene. Now you have to jump across platforms over lava. The first platform has an ammo upgrade on the top. Shoot a spear at it’s base and then run back to the starting area. Climb a little up the stairs and throw a spear blindly at the platform in hopes to get a spear higher. If you get it you can jump from the bottom spear to the top spear and grab the upgrade. Now jump from platform to platform AT THE TOP of the columns to reach the gold ring at the end. Grab the red skull in the corner and grapple hook down the side. There should be two flamethrowers to your left and right so you will need to do this quick. While hanging from the side swing to the right and then to the left and jump off. Now that you’re at the other side you’ll have to jump from these platforms to platforms until you reach some stairs. Head down the stairs a little and some skeleton demons should jump up towards you. Remember to defeat them you must shoot them enough so they fall to the ground, then detonate a bomb on their bodies before they rise again. Head back up the stairs and pull the gold handle. Now rush down the stairs and into the challenge tomb before the flames rise in the door way. You may need to add some speed artifacts and dive.The tomb is relatively simple. There are three balls around the tomb. You just need to roll them into their pressure pedestals on three of the four sides of the square. The more balls you put on the faster the fire around the square will go. Don’t touch the fire or you’ll die. Once you place all three balls in their spots, the middle area will open and you can grab your relic from this location:
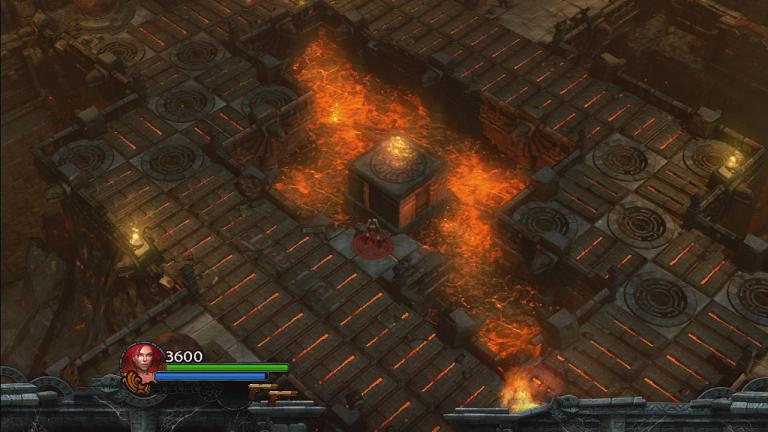
It is the mask of ehecatl. Now exit out of the tomb, but make sure you don’t touch the fire since it’s still going around. Head down the stairs and you’ll reach a ton of flamethrowers and spider platforms.
Jump to all 6 to get a challenge completed. There’s also a red skull on one to the left and a health upgrade to the right. Just jump on them in this order and watch out for the flamethrowers.
|6|1|
|5|2|
|4|3|
The red skull is on platform 5 and the health upgrade is to the right of platform 2. You have to jump down from platform 4 to proceed. You’ll run down some stairs with more fire on the right wall! Walk when there’s no fire and stop when there is. After that are spinning platforms. On the bottom side of the platforms are molten rock. The other side is fine, you need to jump on those sides. When you get to the other end you’ll find another fire like trap. There are two flames spinning around a new weapon (a chaingun). There are also two red skulls within the flames. They move fast so look out, if they touch you then you will die instantly. When you get close, two giant enemies will pop out from both sides and attack you. Take them out and they may drop some health and ammo packs. There should be more health packs in the urns next to you too.
Continue on and you’ll see more spinning platforms like the ones before the fire trap. Jump from platform to platform on the good sides. At the end you’ll find new enemies, fire demons. These guys shoot fire balls at you in a spread like fashion. You’ll face a few of these guys along with skeletons and regular demons. There are tons of urns with health and ammo packs. The columns can help protect you from the fireballs being thrown around. After those guys you can move on. Go to the left top area and into a room.
In this room you’ll find a lava pit in the middle of the floor and some flamethrowers on the wall in front of you. Move close to the flamethrowers and they’ll start to move. Throw a spear at the all and wait for the flamethrowers to move away from the spear. Jump on the spear and up to the next floor. On the next floor you’ll find some spinning heads that shoot out flamethrowers. You can shoot a target in the middle of them to make them change direction, it seems to help. Jump from platform to platform and lookout for the first flamethrower. When you reach the third one, shoot the target again so the second flamethrower moves away from you. Jump to the fourth platform and then to safety.
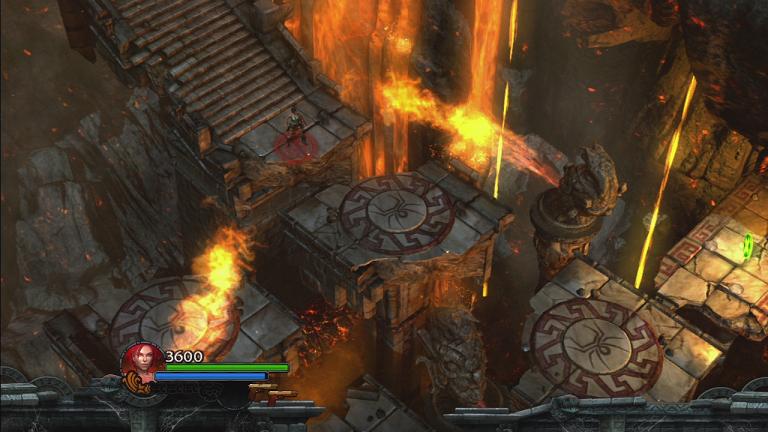
Next up is this crazy area:
You’ll want to walk onto the floor with the flames shooting up. Make sure the flames are going left to right. When you get to the middle, use your grapple hook to hang off the platform directly under the gold ring. The flames will then move right to left. When they pass you head back up top and run pass them to get some gems if you want. If not then climb down a bit and swing to the right to grab the red skull. Swing to the left and drop a bomb on the target. Detonate the bomb to remove the flames beneath you so you can progress. There’s an ammo power up to the left of the target. To get it you must stand on the little flame holder under it. Throw a spear straight forward and jump on top of the spear to reach the power up. After all that you need to move to the right. You’ll see more flames and arrows shooting at you. You need to dodge the arrows and move with the flames. The first flames will move slowly up 4 spaces or so. After that they’ll start at the beginning again. There will still be flames at the end that move slowly up a few spaces. You must wait for those to start behind you just like the first set. While you’re waiting you must dodge arrows and a giant shield demon that will come up behind you. When you have the chance, run off the flame platform and blow up the arrow traps. With those out of the way it will be easier to take care of the shield demon.
After the shield demon you’ll have a small fork going left and down/right. Go down/right to find a red skull and a boulder. If you roll the boulder to the area before the last flame traps to heal it on the health shrine then you’ll get a challenge completed. Use your bombs to launch it over the gap. The fire trap is the most tricky. Launch the ball over the fire trap with another bomb. Then you must time your jumps just right to jump over the fire before the flames shoot up. You can tell where the flames will be when they’re small, that’s when you jump. After that you roll the ball to the health shrine and get the challenge complete for a wind drum!
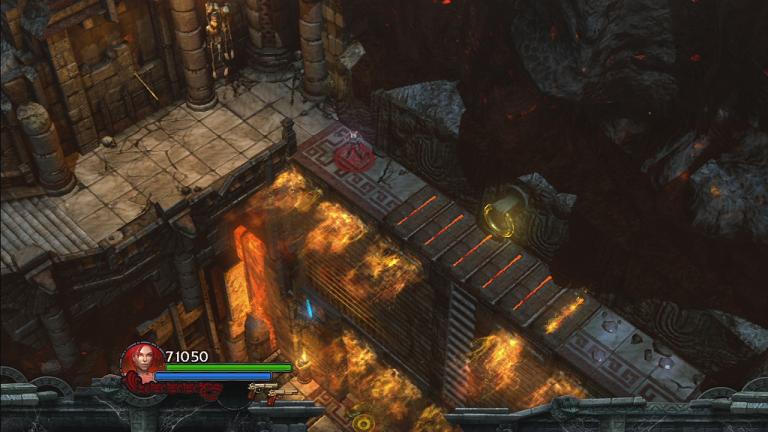
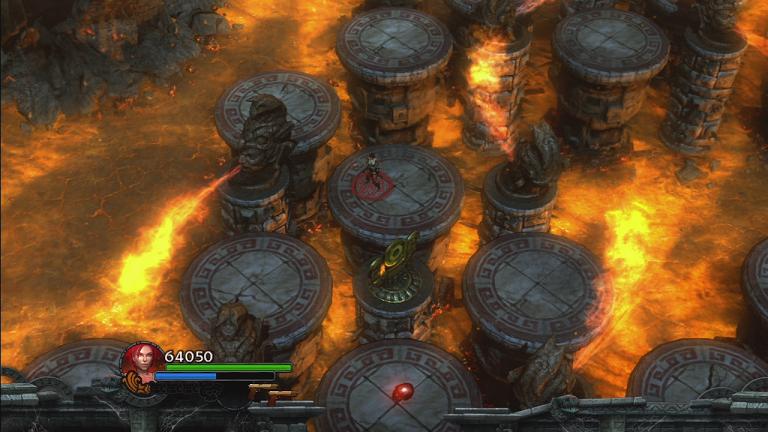
Head back to the fork in the road and take the left path down some stairs. You’ll reach more spinning flamethrowers and a target in the middle of them. It’s a bit tricky and you have to move fast. Jump from platform to platform until you reach the second one before the last one at the top left area. This is when you shoot the target and keep going up/left to a challenge tomb. The tomb is pretty simple. Jump to the middle spinning L shaped platform and hit the target so it moves the platform twice. Go to the target and drop a bomb on it. Next head to the other platform that the L shape takes you to so you can pull a gold handle. Pull the gold handle, jump on the platform, and detonate the bomb. The L platform should move and take you to the now opened cage with an artifact inside. You have to time it just right so you detonate the bomb in mid air when you’re jumping from platform to platform. You can’t wait for the platform to come to a full stop either. You may want to use some speed boosts and roll to the war drum.
Now head back to the platforms. Jump over three platforms and hit the target. Jump over to one more platform and you may need to hit the target again. Keep jumping until you reach a new section of platforms and a new target:
You’ll see a red skull. The target is a little awkward so you may not hit it right away. Don’t panic, just move away from the flamethrower and shoot at the target again. Jump to the platform to the left of the target and shoot the target so you can grab the red skull. You may need to shoot the target again so you can continue to go right and grab a health upgrade. If the flamethrowers get close to you just hit the target again. Make your way back doing the same thing and take the left path to safety.
You will be taken to a new room with an ammo cache at the bottom of the stairs. Get ready for a fight, better than the obstacle course and traps right? Maybe. Anyways you’ll get a challenge that says sacrifice some skeletons to the scorpion crest. To do this you must kill them and detonate a bomb on their dead bodies over this crest:

It seems pretty simple and there aren’t too many demons in this area.
When you’re finished with that you’ll come across more spinning platforms. There are two red skulls in this area. One is on the far right platform and the other is on the second to the left platform. Jump from platform to platform to try and reach them. You may have to take two tries if you’re not quick enough. I started off on the right platform and kept going right. Then I jumped to the left platforms and died. So the next life I jumped to the left platforms and made it to the end. There are also flamethrowers on both sides of the spinning platforms so lookout for those. After that you’ll encounter an area with falling flaming balls that explode after a second or so. There are gems all over and the last red skull is in the left top corner. Make it to the other side and run up the steps to end this level!