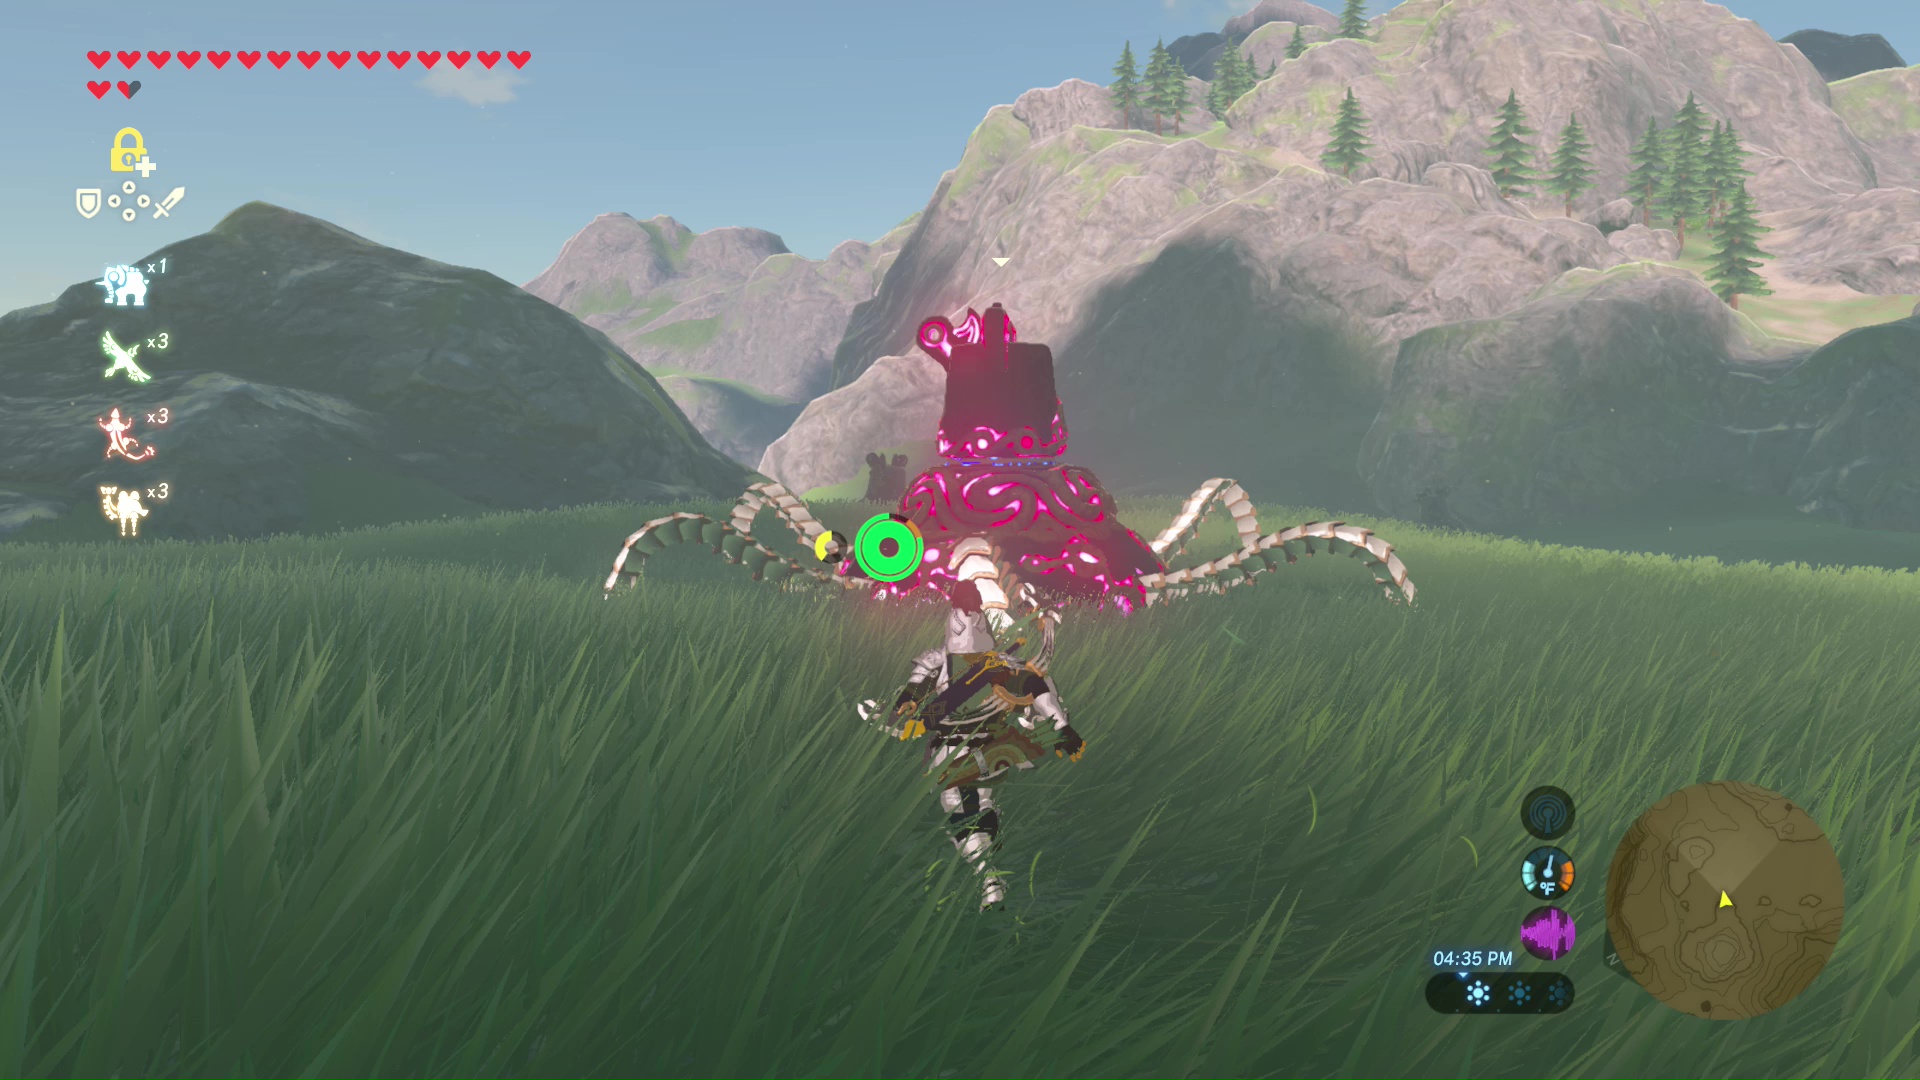
The Legend of Zelda Breath of the Wild features a small number of monsters that roam Hyrule. However, the enemies increase in difficulty as progress is made and new areas are reached. The increase in difficulty is noted by their different colors and names: red (original), blue, black, stal- (skeletons), and silver.
Stal- creatures must be defeated a bit differently than living ones. After causing the skeletons to collapse, quickly chase the skull and attack it until the health meter depletes. Most times multiple undead monsters will be in close proximity, which means all of the monsters’ heads must be destroyed before the skeletons are destroyed.
Additionally, some monsters appear with different elemental properties and abilities. Avoid making direct contact with them, or they can cause various effects. Fire can be neutralized by ice, and ice can be neutralized by fire.
| Element | Effect |
|---|---|
| Fire | Causes additional damage while the enemy is ablaze, and causes wooden weapons to be set on fire. Weapons on fire cause more damage but deteriorate faster. Fire is strong against ice enemies. |
| Ice | Freezes a target solid, leaving them completely vulnerable to attacks. Ice is strong against fire enemies. |
| Electricity | Temporarily stuns a target and causes them to drop their currently held metal weapon, bow, and shield. Electricity deals extra damage in bodies of water. |
Killing monsters and clearing camps around Hyrule is only temporary. Every so often, a blood moon will rise in the night sky. This crimson moon allows all defeated monsters to rise from the grave, filling all previously cleared regions. Try to avoid the wilderness or any camps while the blood moon rises if you don’t wish to fight a ton of monsters and harvest monster parts.
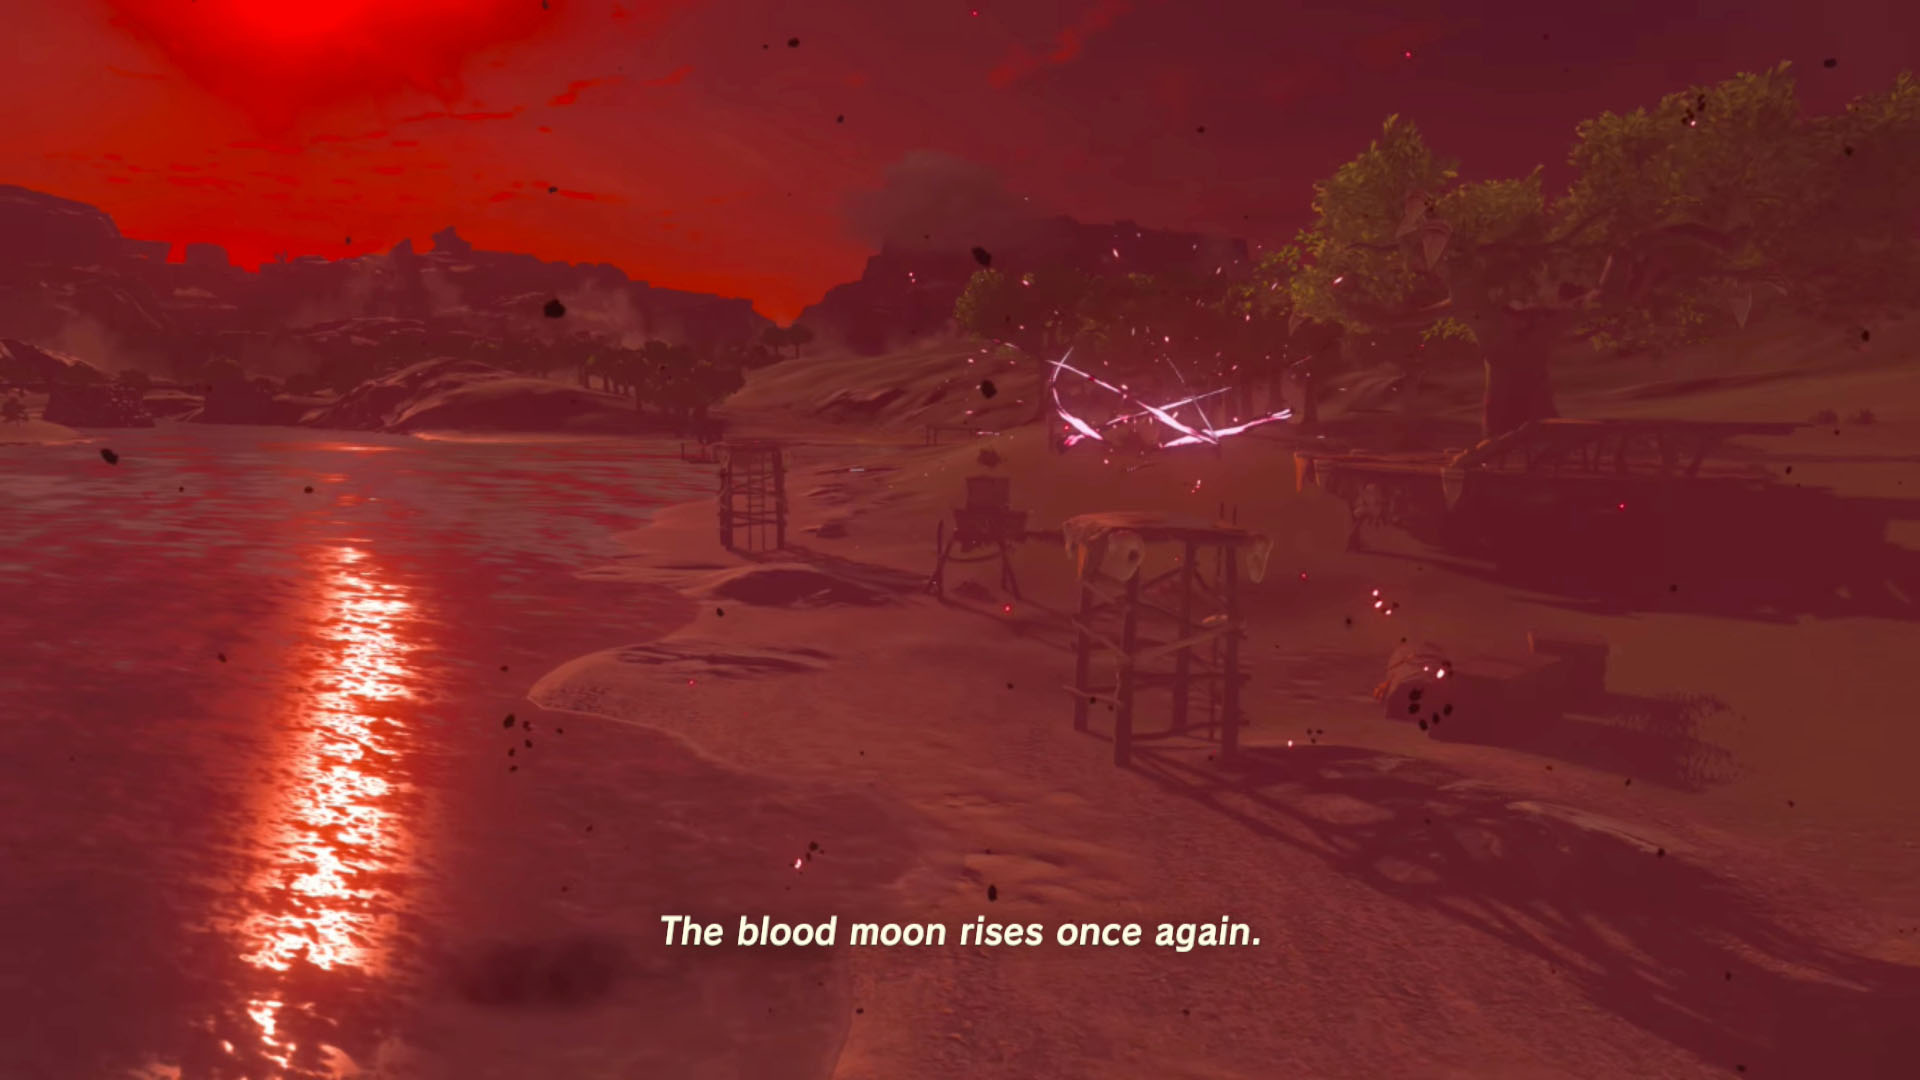
The blood moon will randomly appear; however, it will only be visible in the night sky between 9:00pm and 12:00am in-game time, but monsters will not arise until midnight. Try interacting with different NPCs or cooking while the red moon is active to discover different effects.
Bokoblin
A medium-sized, humanoid creature that often attacks with clubs or bows and arrows. They have average speed and power. Bokoblin have alternate colors to show their difficulty.
Moblin
A large, humanoid creature that often attacks with clubs and lances. They have high power and low speed. Moblins have alternate colors to show their difficulty.
Chuchu
A creature that looks like a ball of jelly. They are often very weak and slow, and can attack in swarms. Chuchu appear with different elemental properties.
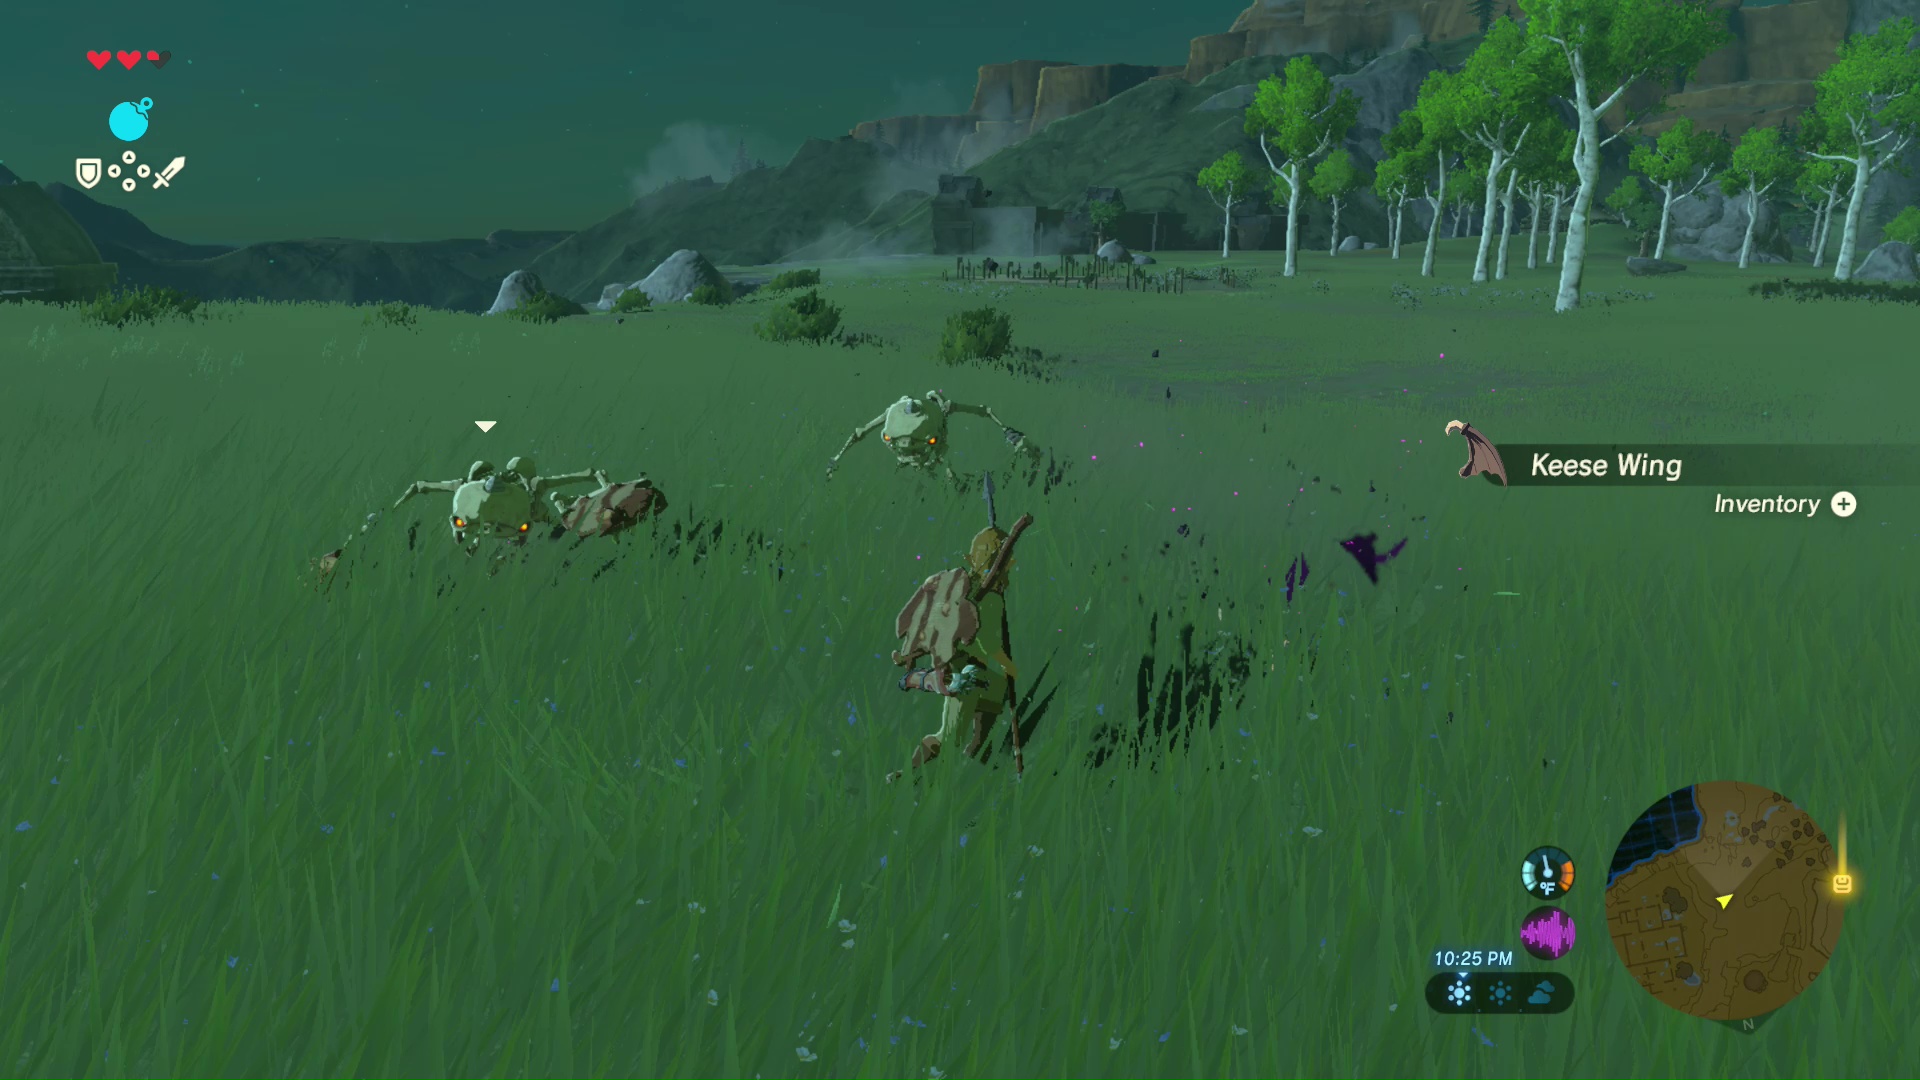
Keese
A flying, bat-like creature. They are often very weak and slow, and can attack in swarms. Keese appear with different elemental properties.
Lizalfos
A medium, lizard-humanoid creature that can attack with any sort of weapon. They are very fast, but have average power. Lizalfos have alternate colors to show their difficulty, and some appear with different elemental properties.
Octorok
An ocotopus-like creature that buries itself in the ground or hides beneath the surface of the water. They pop out when least expected to shoot a rock from a distance. They are sneaky and can pack a punch, but don’t have the best defenses. Octorok appear with different elemental properties.
Wizzrobe
A humanoid creature that dances in the air. They attack using different elemental wands, and can disappear for a short time during battle. They are sneaky and strong. Approach them with caution, and aim for the head with your bow and arrow to stun them. Wizzrobe appear with different elemental properties.
Pebblit
A small creature that resembles a rock. They attack very slowly, but can pack a punch. Their extremely high defenses can make them tough to take on, but at the same time they can easily be outrun. Pick up a Pebblit and throw it or blow them up with your Bomb rune for easy kills. Pebblit appear with different elemental properties. If they are ice pebblits, use fire to turn them to stone before picking them up. If they are fire pebblits, use ice to turn them to stone before picking them up.
Talus
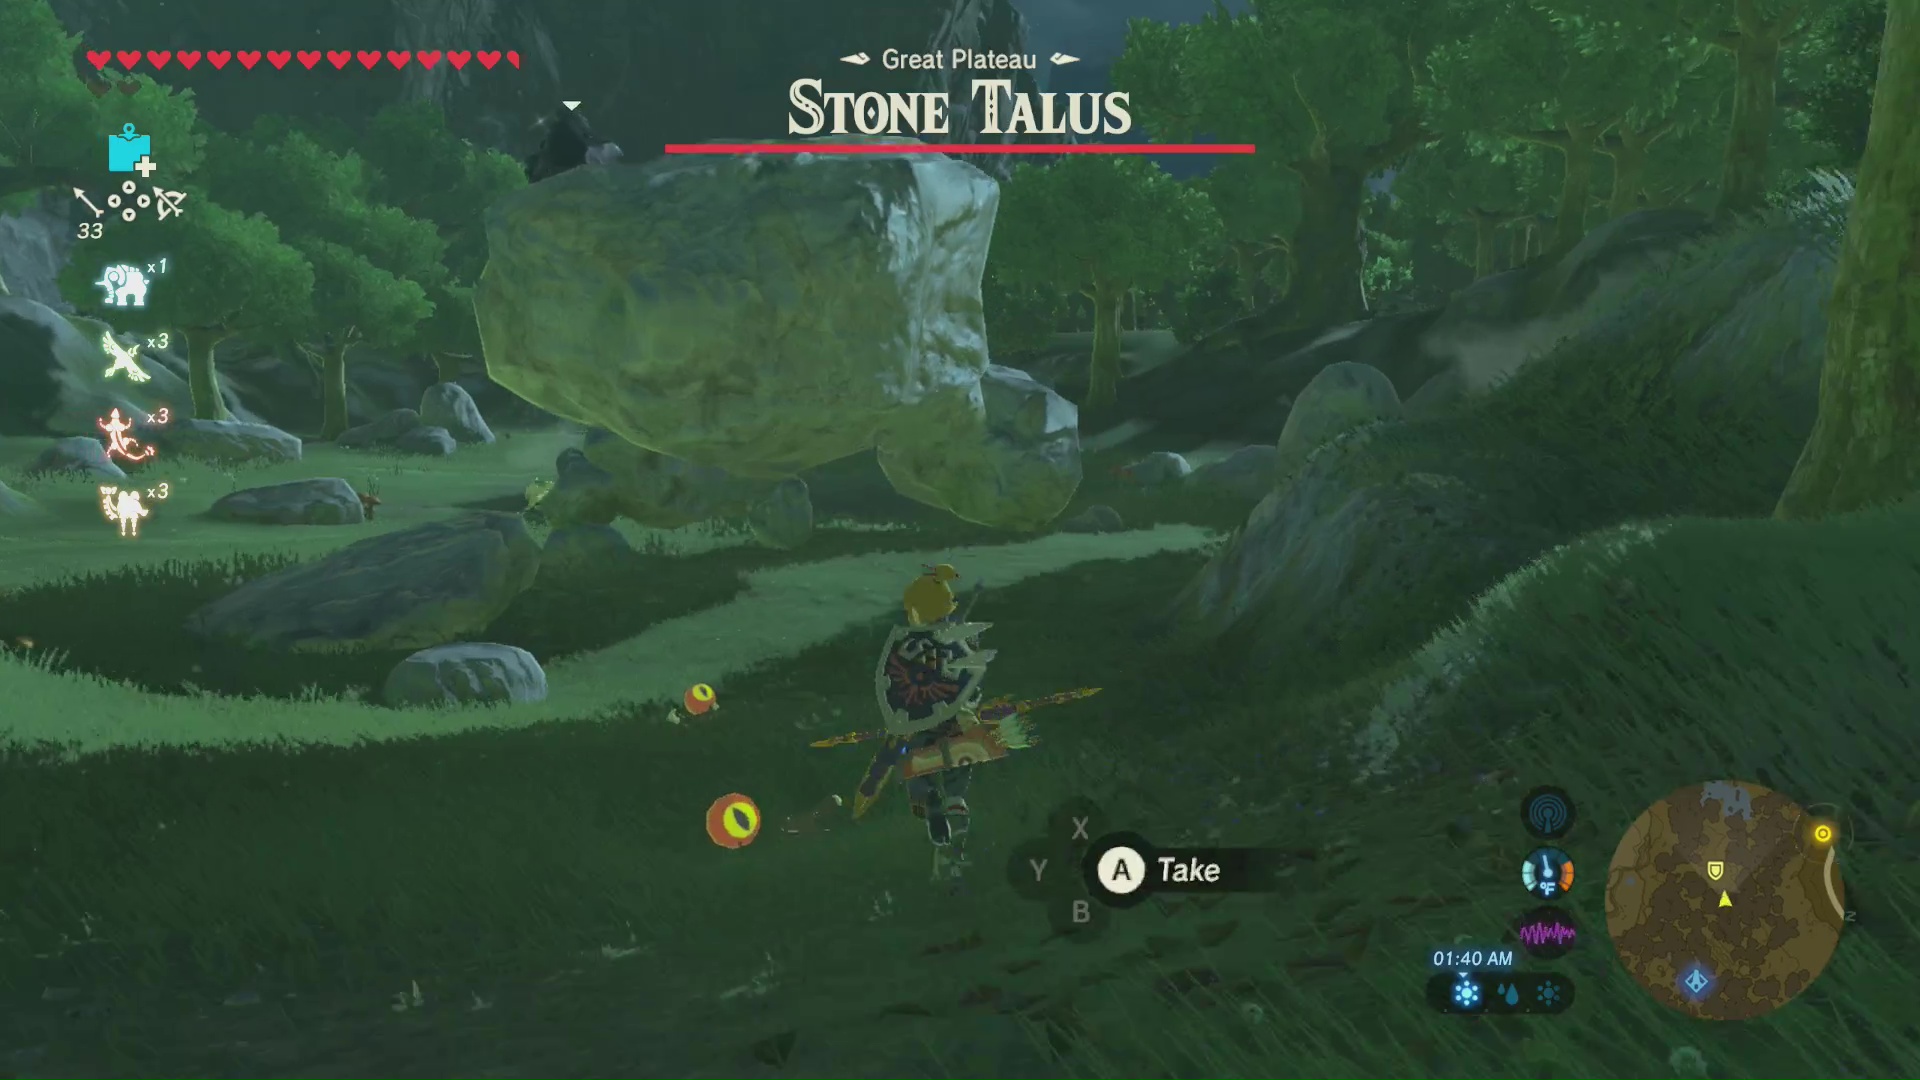
The average Stone Talus is actually very easy to defeat once decent armor and weapons are obtained. This monster will shoot its two arms directly at you, though it won’t move all that fast while doing so. Avoid its punches and try to climb onto its back. At the top-back region of the Talus is a black stone that looks like a mineral deposit. Attack this black stone with a smashing melee weapon to deal massive damage. Even shooting this weak spot with an arrow will stun the Talus for a moment and deal minor damage.
Talus imbued with fire and ice can also be found around Hyrule. These Igneo Talus and Frost Talus will cause additional elemental effects, and cannot be climbed or even touched until their element is laid dormant by hitting it with an opposite element. If it’s an ice Talus, use fire; and if it’s a fire Talus, use ice.
Hinox
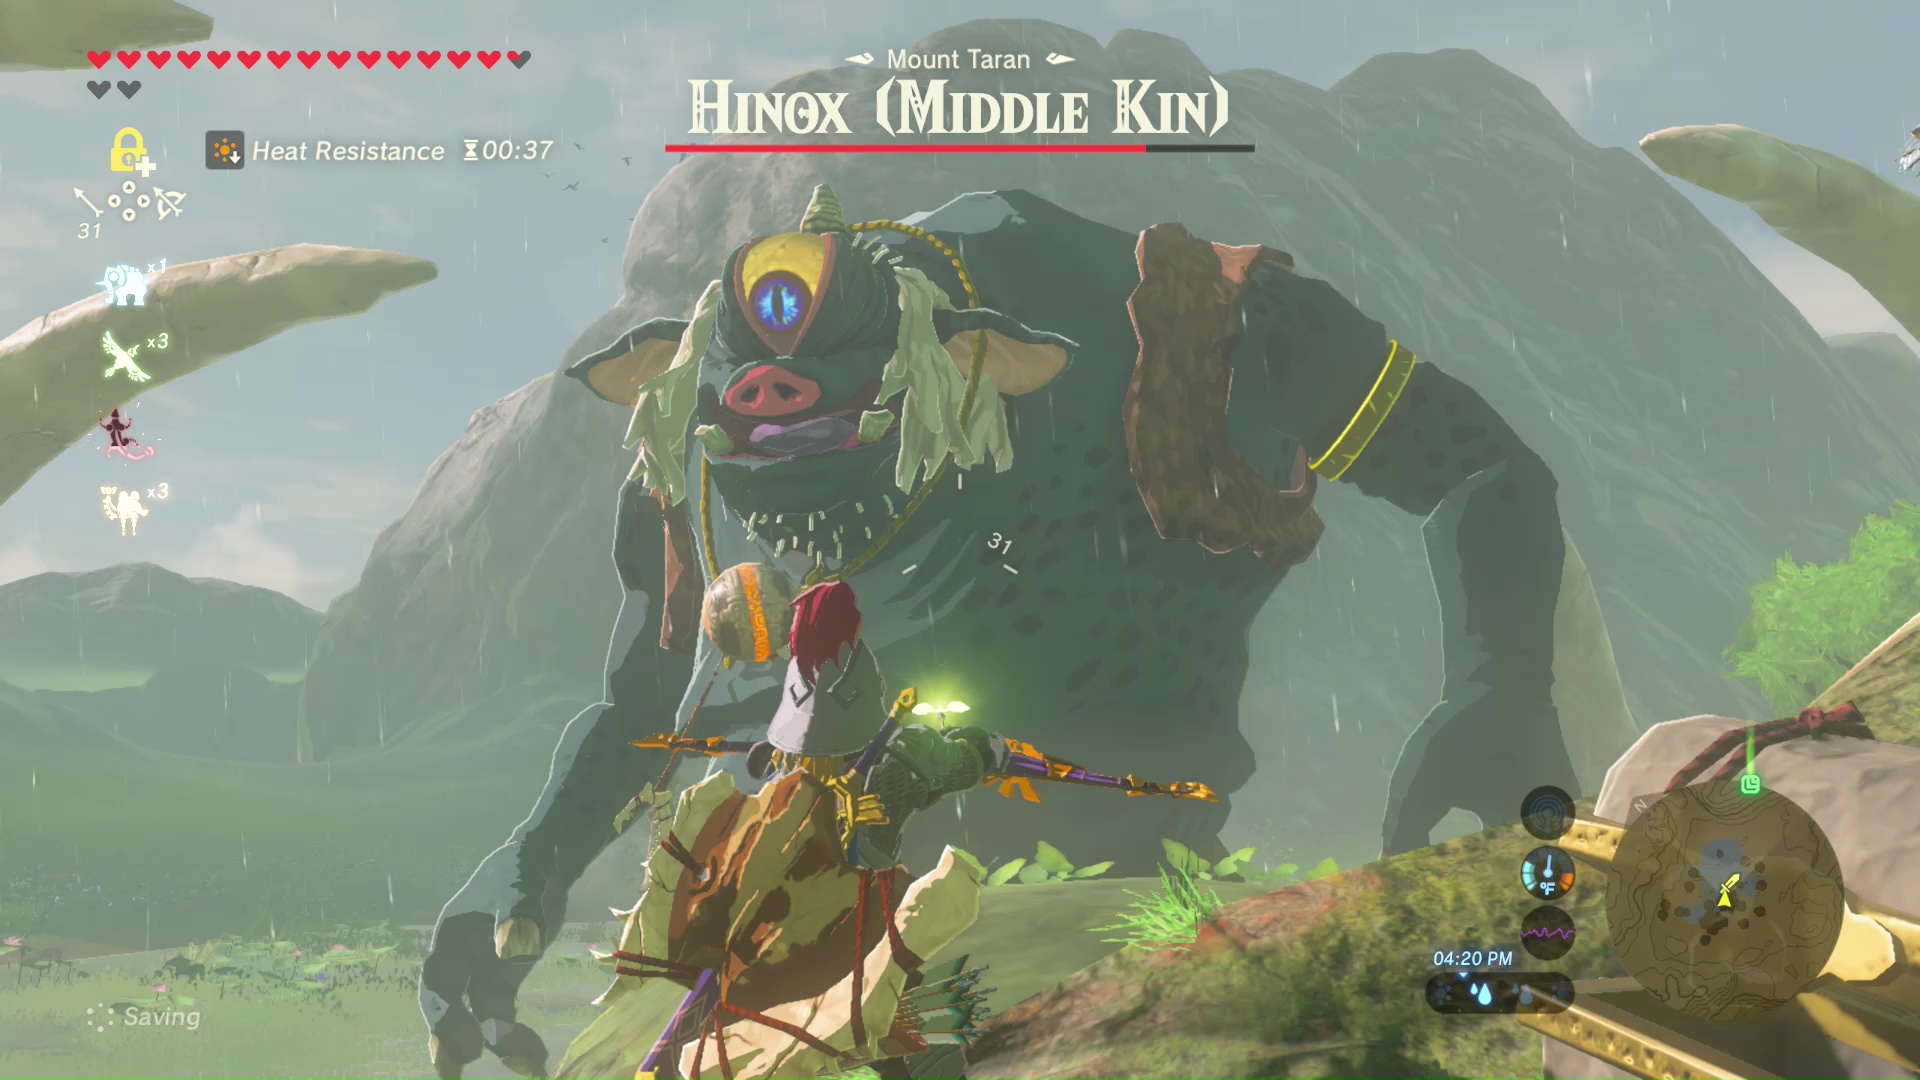
Hinox are large, cyclops monsters. They can be found sleeping on their backs around Hyrule. Sneak up to sleeping Hinox to perform a few attacks on their weaker gut. Using Stasis + while the Hinox is on its back is also very useful. Once the Hinox stands, minimal damage will be done to its legs and feet. The best option is to shoot an arrow directly into his eye, stunning the beast and leaving him open for attack to its stomach again. While the Hinox is sitting, the three weapons around its neck can be grabbed before the monster decides to use them.
As the battle goes on, the Hinox will attempt to shield its eye with one hand. Continue your attack at its legs if you can’t pull off a decent eye shot, but beware of the Hinox leaping in the air and landing on his backside, damaging anyone nearby.
Guardians
Guardians are the ancient machinery that can be found roaming Hyrule. The most common version is the Guardian Stalker, which looks similar to a spider or octopus. Their only attack is the guardian beam, which is shot directly from the single eye on the head of the machine. It will take several seconds to charge, and a laser beam will point directly at Link during this time. The beam attack will cause massive damage and set anything nearby on fire.
These machines can move quickly but they’ll keep a short enough distance from Link that he won’t be able to deal damage with melee attacks. Freeze Guardians momentarily with the Stasis + Rune, then attack their legs with weapons that use the same ancient technology, or use a melee weapon that cuts. The legs should snap off after a few hits.
With no where to go, the Guardian Stalker can only attack with their charge beam, similar to the Guardian Turrets. You can stop this attack and hit the Guardian’s weak spot by shooting an arrow into the eye the beam emanates from.
Another option is to use a perfect guard to send the beam back at the Guardian’s weak spot. To do this, equip any shield, hold it out in front of Link by holding L, and press the A button just before the beam makes contact with the shield. The Goron Champion’s Power will also automatically send the beam back to the Guardian without the need for pressing A at the right moment.
The last option is to continue using the Stasis + Rune and attacking just before the Guardian can shoot its beam. Stasis + with any attack will momentarily stop the ancient machine from attacking. The Rune should recharge just before the Guardian charges its beam attack again.
The Guardian Skywatcher is a flying version of the ancient machinery enemy. Similar to the other Guardians, a well-aimed arrow to its eye will stun it momentarily. The best way to take care of these beasts is to shoot their three rotors to land them on the ground. Once immobilized, attack head on until it’s defeated.
Lynel
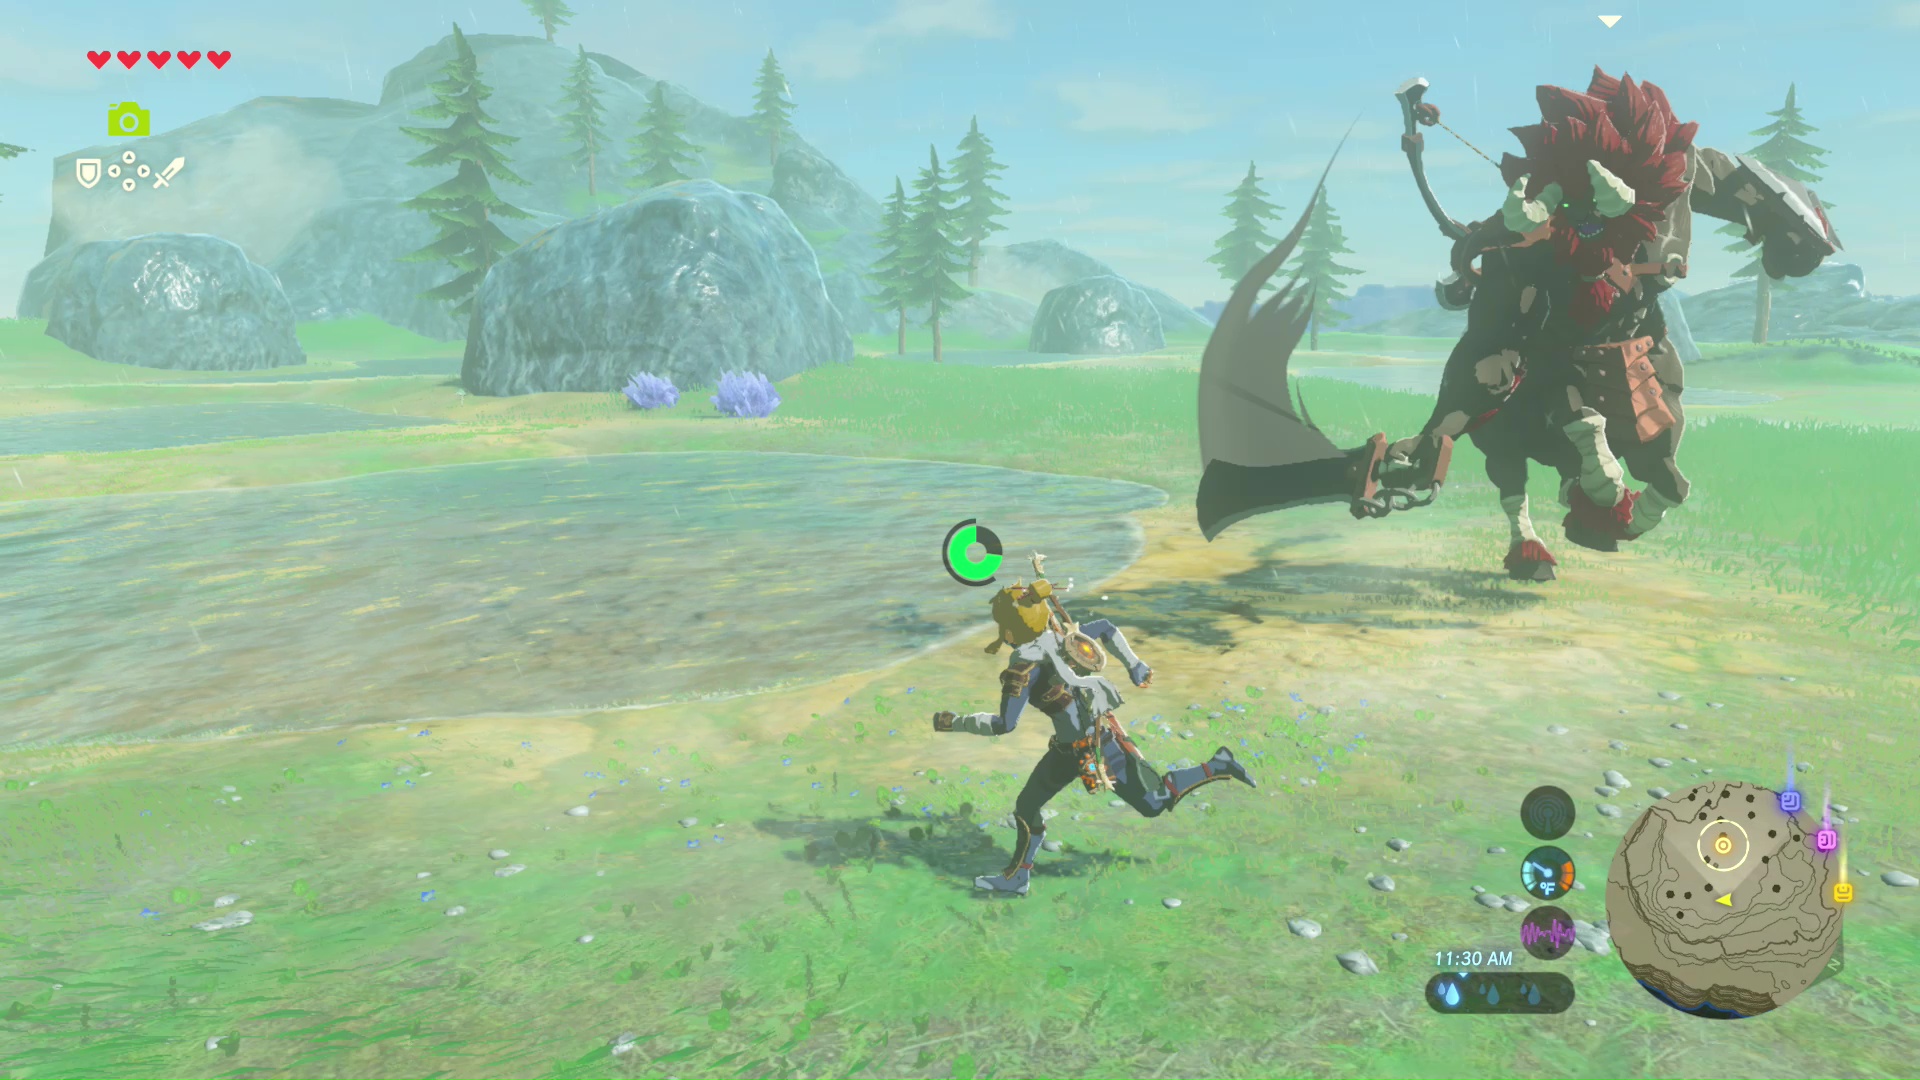
Lynels might be the toughest non-bosses in Breath of the Wild. They are centaur creatures that are incredibly fast and deal massive damage. They can attack from long range with bows that shoot multiple arrows at once, charge directly at Link to close the gap, and attack with large, crushing melee weapons.
The easiest way to deal with a Lynel is aim for the head with bows and arrows, dodge its attacks as much as possible and counter with fury strikes, and use the Stasis + Rune to stop any of its strong attacks. Avoid using electric attacks, as most Lynel seem to be resistant to them.
After the Lynel takes several decent hits, it’ll drop to its knees for a second or two. Use this small window to mount the Lynel and attack with a melee weapon from behind. Immediately run away after being bucked off or the monster will most likely attack with its melee weapon.
When Lynels lose enough health, they will begin using an ultra-powerful attack. A large explosion spans out around the Lynel, and anything in the blast radius will take massive damage and become engulfed in flames.
Modulga
In addition to the other Monsters that appear in different forms around Hyrule, there is a tough creature that sometimes appears in the sands of the Gerudo Desert. It is a large, fish-like creature called the Modulga. They will attack from beneath the sand, making them nearly impossible to hit before you get back up on your feet. The best way to counter them is by using the Gerudo Champion’s special power by holding the Y button and releasing it. This attack deals massive damage to anything nearby.
While the Modulga is injured, it will be laying on its side on top of the sand. Use the Stasis + Rune to prevent it from burrowing back in the sand, then attack it as much as possible.