A few cut scenes and real time scenes play.
The Police Station
From the start of this episode to a certain checkpoint you can’t die if you want the “Idyllic Small Town” achievement or whatever it’s called. You can’t restart either. If you restart it has to be from the beginning of the level. Exit the cell and pick up two Manuscript Pages entitled, “Nightingale Reads the Manuscript,” and “Nightingale Attacked by the Dark Presence.” Follow the sheriff and exit the cell corridor. Head left into the next room and pick up two flares. Exit the room and head behind the front counter for a coffee thermos. Follow the Sheriff to the fuse box and she’ll open up her office. There you will find a bunch of supplies: a flashlight, lithium batteries, a revolver, two boxes of revolver ammo, a pump action shotgun, and two boxes of shotgun ammo. Follow the Sheriff outside and you’ll need to find a way to open the gate. Head to the area where you got Alice’s Driver’s license by the old rusty car. Through the fence. Watch out because there’s some black goo here and there. Head to the ladder on the side of the building and use a string to bring it down. Then climb up it. At the top there’s more black goo and two flares. Head up the little staircase that leads to a ladder on a silo. Watch out for black goo at the top, then jump down. There will be a little more goo and some birds will fly at you. Use your flashlight and batteries to take them out, and if they start hurting you badly then use a flare or two. Head to the end of the roof on the left side. You can go up a ramp and walk on a platform. Then you’ll have to jump the gap and click a button on an elevator scaffold thing to go down. You need to head to the control box for the gate next to the sheriff. Before you do that you can go across the street in an alley by a dumpster to find a flare. Head back to the control box. There will be black goo all over it, destroy it quickly and press the green button. After you fix it turn around and there will be a red emergency box on a building with some supplies: 3 flares, revolver ammo, and batteries. Follow the sheriff a few feet and Taken will come at you and overturn a car. Seems the car is possessed so destroy it quickly with your flashlight. There are about 6 regular Taken and a strong Taken. Don’t worry the sheriff will help you out.
The Streets
Head to the intersection and the same amount of Taken will come at you from the left. Watch out for the truck and float that zooms by. Tag team with the Sheriff and you’ll make quick work of them. If you have trouble remember your flares! Before heading to the left towards your objective head to the right. Go as far right as you can crossing some boards onto a wooden deck and you’ll find a hidden chest containing a flare gun and flare gun ammo. Not far from there is a Seafood warehouse. It’s big and tin with the words seafood written on it. Make your way through the door in the fence and follow some yellow arrows around it. You’ll face a few taken once you turn the corner so watch out. Make some lefts and head up a set of wooden stairs for a hidden chest. Now head back to the main street and go across the street (straight from the intersection) onto another wooden deck like place. You’ll find another coffee thermos. Follow the sheriff and you’ll encounter a strong Taken. Take it out together quickly. Keep looking left and the first alleyway you see, head down. At the end is two flares and two Taken will climb up the fence. Lower their shields when they’re climbing over and shoot them once to kill them. Leave the alleyway and make your first left into the diner from earlier. Inside you’ll find a heavy-duty flashlight, two boxes of revolver ammo, lithium batteries, and a coffee thermos. Use the jukebox at the end for the second time to get the achievement! Head to the back near the bathrooms and find a Manuscript Page entitled, “Barry in the Sheriff’s Station.” Follow the sheriff out and to the pier. On the way you’ll find a flare, lithium batteries, and revolver ammo. Keep following her around the corner and you’ll encounter a few more Taken. If you made it this far they should be no trouble. At the end of the parking lot is a red emergency box with batteries and revolver ammo. Next to it is a green button that turns on a street light. Keep following the sheriff until a car alarm sounds. Head all the way to the end of the street to find flare ammo, revolver ammo, lithium batteries, and a coffee thermos. Head back to the sheriff and she’ll open a door. You’ll get ambushed by a few Taken. There’s about 3 or 4 regular/weak ones and a strong Taken. Shouldn’t be too much trouble. If they surround you use a flare. Then a boss Taken will come with a chainsaw! Don’t let him get near. Use your flashlight and batteries or a flare if he gets to close. You can use your flare gun on him to take him out relatively quick. It should take about two shots. There will also be a red emergency box right in front of you (if you’re looking at the Taken) with some supplies. Head through the fence with the sheriff and look directly to your left. You’ll see a coffee thermos on a table. Head under the other gazeebo thing with tables to find 3 flares. Head inside the house next.
The House
Head inside and there will be some revolver ammo on the sink. You’ll have to search through the house to find the helicopter keys. Go around the corner and you’ll find a Manuscript Page entitled, “The Dark Presence Set Back.” It’ll be on the floor next to a picture of Bright Falls WA. Head upstairs real quick and you’ll find a TV on the wall. Head into the next room on the same floor and you’ll see some yellow arrows on the wall. To the right a regular Taken will jump down from the ceiling. Take him out quickly and turn to the right to see a hidden chest containing a flare and flare gun. Head back down stairs and through the doors towards your objective. Once you go through a door you’ll see a strong Taken. Lower his shield with your flashlight or flare and take him out with a gun. Behind him is an office with a hunting rifle and two ammo boxes for the rifle. You’ll have to switch out your shotgun if you want. In the bathroom to the right of the office, still inside the office, is a coffee thermos. Head into the next room, the clerks office. You can switch out your flashlight for a lantern. There will also be a red emergency box on the wall with supplies, ammo and batteries, on the desk there will be two flashbangs and the keys you were looking for. Exit the door and a cutscene will play.
The Streets and Buildings- To Barry
Head across the street to the sheriff and you’ll see a big statue of two guys and a moose. Read the sign about the founders of Bright Falls under it. Continue on with the sheriff up some stairs. and three regular and a strong Taken will come at you. To the right of them on a park bench is a coffee thermos. Follow the sheriff inside the book store and grab the coffee thermos in the window to your right. Stay to the right and on the wall above the wooden table is a sign about Alan Wake’s books. On the counter there’s a Manuscript Page entitled, “Cynthia’s Work.” Head outside through the door and to the left. Go inside the little shack for a hidden chest containing a flare gun and flare gun ammo. Now follow the sheriff to the playground and look in the sand box to the right. You’ll find a coffee thermos. Follow the sheriff further until she gets to a church. Head to the right next to a truck to find a hunting rifle, two flashbangs, flare gun ammo, and a lantern you can switch out too. Out in the front by the truck is a sign about the church meetings. Head inside a moving truck all the way to the right and you’ll find a Manuscript Page entitled, “Barry in the General Store.” Head up to the sheriff at the door and a Taken assault goes on! First about 4 Taken come from the left, regular taken. Then about 5 or so come from the right. They have strong taken and fast taken. Use whatever you got and take them out! When they’re gone head inside the church and go to the alter. You’ll find a Manuscript Page entitled, “The Dark Presence Hunts Wake.” Go into the next door and you’ll find a red emergency box with ammo for each gun and batteries. Follow the sheriff into the basement or as they called it “the crypt.” While you make it into the crypt you’ll see two strong taken far off. You can kill them before they get to you. If you’re looking at the Taken, then to your left you’ll find a coffee thermos in the dark corner. Reach the other end and kick the door down for a little real time scene. At the end of the parking lot before you head up the stairs you’ll find a red emergency box with revolver ammo, hunting rifle ammo, and batteries. Now into the forest!
The Forest – To the Helipad
Go up the stairs and up the path, you’ll find a wooden deck at the edge of the cliff. On the deck is a flare and a Manuscript Page entitled, “Alice Trapped in the Dark.” Continue through the path until you get on a road. Head right to find two flashbangs inside a white van. When you pick them up a regular taken will come at you. Kill it and move on to the other direction of the road. At some point a few more Taken will come after you. One with a chainsaw, one strong, and maybe two regular taken. It shouldn’t be too much trouble with three people now. If you find yourself in trouble use some flares or the flashbangs you just picked up. Head to the helipad and you’ll find ammo and guns everywhere. There’s a flare gun, pump action shotgun, ammo, flashbangs, flares, and batteries. To the left you’ll find a coffee thermos. To the right is an red emergency box with more ammo and batteries. Once you get to the helicopter the gates will close and hordes of Taken will come at you. You can use the search lights to weaken them and shoot the propane tanks to blow them up. With all the supplies you now have it shouldn’t be too hard to take them down. If they get too close or if you get hurt just hold a flare or throw a flashbang. About half way through the waves the darkness tornado will start throwing steel beams that stick in the ground. I don’t think you can get hurt by them, just stick close to the heli. When you’ve killed enough Barry will tell you to come to the heli to take off. Head to it and a cutscene will play.
The Transformer Yard
After the scene you’ll land in a parking lot. All you’ll have left is a HD-Flashlight with two batteries. Some birds will come at you, just burn them with your light and you’ll be good. After that head to the right(if you’re looking at the building) in the grass to find a coffee thermos. Now head left to a little shed like thing with an open door. Inside you’ll find some batteries, a revolver, and a box full of ammo. Next head to the garage door that is trying to open but a chain is stopping it. Shoot the chain and the door will open, but turn around quickly because Taken will come after you! About 3 Taken will come, a weak, regular, and strong Taken it seems. Do all you can do by dodging and using your flashlight and revolver to take them out. Head inside the warehouse to find supplies like revolver ammo, batteries, lithium batteries, 3 flares, a pump action shotgun, and lots of shotgun ammo. To the left of all the supplies is a little ramp that heads backwards and up. Walk up the ramp and head back to jump over the fence. On the other side you’ll find a radio with the band Poets of the Fall playing a song called “War.” I believe it’s on the Alan Wake soundtrack. Anyways watch out because a few Taken will appear. Two strong and two weak taken. If they get too close use the flares you just picked up and shoot the red propane tank near by. As you head towards the door more and more will come. Just stay calm and use the same tactics. On the other side of the big cement pipe looking things is a coffee thermos. Now head out the door and around the mountain trail until you jump down to another cement like area. First head left and you may see some yellow arrows here and there. At the end is a hidden chest with a flare and flash bang. Go back to the other area and you’ll see a green light/button, click it to open the gate. On the other side you’ll see a strong Taken come at you and die when he touches the power lines. Guess what, DO NOT TOUCH THE POWER LINES OR YOU’LL DIE. Go around the right side and you’ll get close to the water. You’ll see a green button you can press to turn on a street light for a Safe Haven. Next to it is some ammo and batteries. Continue up the stairs and three Taken will climb over the fences. One is strong the other are regular. If you get in trouble use the flare you just picked up, and don’t run into the power lines. Next go through the door the strong taken just came from and you’ll find another one. Keep your flashlight on him and move back out of the door way. His shield should disappear so take some shots at him and take him down. Go back to where the strong taken was and head around the transformers. When you come to a crossroad head left and you’ll find a Manuscript Page entitled, “Cynthia on her way to the Damn.” Turn around and go the other direction. You should get a checkpoint and there will be a red emergency box on the right. Inside is 3 flares, batteries, revolver ammo, and shotgun ammo. Continue making your way around the transformers. When you get to an area where you’re surrounded by power lines two strong taken will come at both ends and sandwich you. You can throw a flashbang here if you still got one to kill one of the taken. Then turn your attention to the other, you can blind him and shoot him towards the power lines to kill him instantly, or just kill him the old fashioned way. When you leave that little transformer power line area and walk down a small set of stairs look to the right for a coffee thermos. Turn around and go the other direction next. You’ll find a blue lift. Click the green button to bring it down to your level and jump on. When you’re on click the second green button on the lift to raise it back up. At the top is a Manuscript Page entitled, “Wake’s Plan.” Jump down the other side into the forested area.
On the Road to the Power Plant
Make your way through the path until you come to a street. To the right you’ll find a sign about a memorial bridge. After reading it head forward to the little office. Go along the right side to pick up a coffee thermos. Continue around the back to enter the office and a Taken will come after you. Destroy it quickly and head inside. Inside is a flare gun, some flare gun and revolver ammo, and some lithium batteries. Use the controls on the green flashing light to move the bridge and head outside quickly to jump on the bridge. The bridge will keep spinning around and never stop so make sure you jump on and jump off when the time comes. When you’re on the bridge you’ll get attacked by some birds. Use your flashlight and flares to take them out. Once on the other side of the bridge enter the bridge control room. Inside you’ll find a coffee thermos, a TV, and some supplies like a shotgun and ammo. After you have everything head outside along the trail towards the power plant. The helicopter will fly around you and help take the taken’s shield’s down. You’ll encounter a few taken, usually in groups of three with one strong one. If they over whelm you then pop a flare to give you breathing room. You’ll find another flare on the path towards the power plant. Once you see the building head to the right and you’ll find a hidden chest containing two flashbangs and two sticks of flare gun ammo. Now go back and take the left path around the building. You’ll see a street light and under it will be some revolver ammo, batteries, and a flare. Continue on the path and you’ll encounter 4 taken, nothing big. Once you defeat them you’ll jump down into the power plant parking lot. Head to the left corner to find a coffee thermos. Before entering look to the right of the door and you’ll find a sign that says warning decommissioned power plant etc. Head inside the power plant for a small cut scene.
The Power Plant
Once inside there will be some nice supplies. A few flares, batteries, flashbangs, and a heavy duty lantern. Inside her room is a flare gun and another coffee thermos. Now you must head outside to cut the power to the transformer yard. The gate to the right will open. Down the stairs a few taken will come after you. After they’re gone you must head right and go down a ways. You’ll reach a place with three buttons and a sign giving caution next to them. You have to figure out how to get to the switch to cut the power. Click the first, third, first, and second buttons in that order to have all three gates shown. Cross all three like bridges and you’ll end up at the switch. There will be a flare, two boxes of shotgun ammo, and a can pyramid next to them all. Cut the power for an achievement. Once all the power goes off the gates that you used as bridges will start opening and closing. You’ll have to run across each one before they open up. Return to Cynthia Weaver. On the way back you’ll encounter a few taken. Some strong, some regular, and one boss with a chainsaw. Use what you got to survive! Flashbangs and flares help out a lot. Then shoot them with shotguns. Once you get back to the power plant you’ll see the gate is closed, just press the button to the left and it’ll open. Now enter the plant and follow Cynthia Weaver. On the way Cynthia will tell you what happened. You can pick up some supplies and exchange your shotgun for a hunting rifle. Once Cynthia opens the tunnel a cutscene will take place.
The Forest/The Crash Site
You’re now outside and you have to make it to the crash site. Make your way down and in the distance, not too far, is a Manuscript Page entitled, “The Falling Helicopter.” Move on and you’ll encounter some birds. Take them out with your flashlight or flare gun. They should’t be too much trouble. When done continue down the path and reach a street light with a red emergency box under it containing ammo and batteries. Head around the side to reach the crash site. More birds will attack you, it seems these ones won’t give up. You can try and achieve the 1000 bird kill achievement with all your types of light sources to kill them off. If you get too hurt and are running low on supplies then run towards the crash site and they should stop attacking you. When you leave the crash site you’ll find some flares and flare gun ammo. Not too far from the crash site you’ll find Barry and Sarah. They’re fighting some Taken, help them take them out. Once they’re dead head around the left side of the building and follow some yellow marks that were once arrows. You should come up on a hidden chest containing a rifle and rifle ammo. Continue on the mountain path to your objective and you’ll come across a street light with an emergency red box under it containing ammo and batteries like usual. On the way to the next checkpoint you’ll come across two quick taken. They shouldn’t be too tough. Use light sources to slow them down and take them out. Make your way up to the dam and you’ll find a coffee thermos in a giant cement tube. Go a bit forward to the elevator and you’ll see a red emergency box with a flare gun, revolver ammo, and batteries. Call the elevator and waves of Taken will come at you. Strong and regular. Once the elevator opens up get inside and press the button to get to the next level. At the top when you exit look directly to your right and you’ll see a coffee thermos. To get into the dam you have to press a green button to the right of the entrance. Next to it is a sign about the dam. Hit the button to open the door. You’ll find out the door is broken so you have to hold it down next.
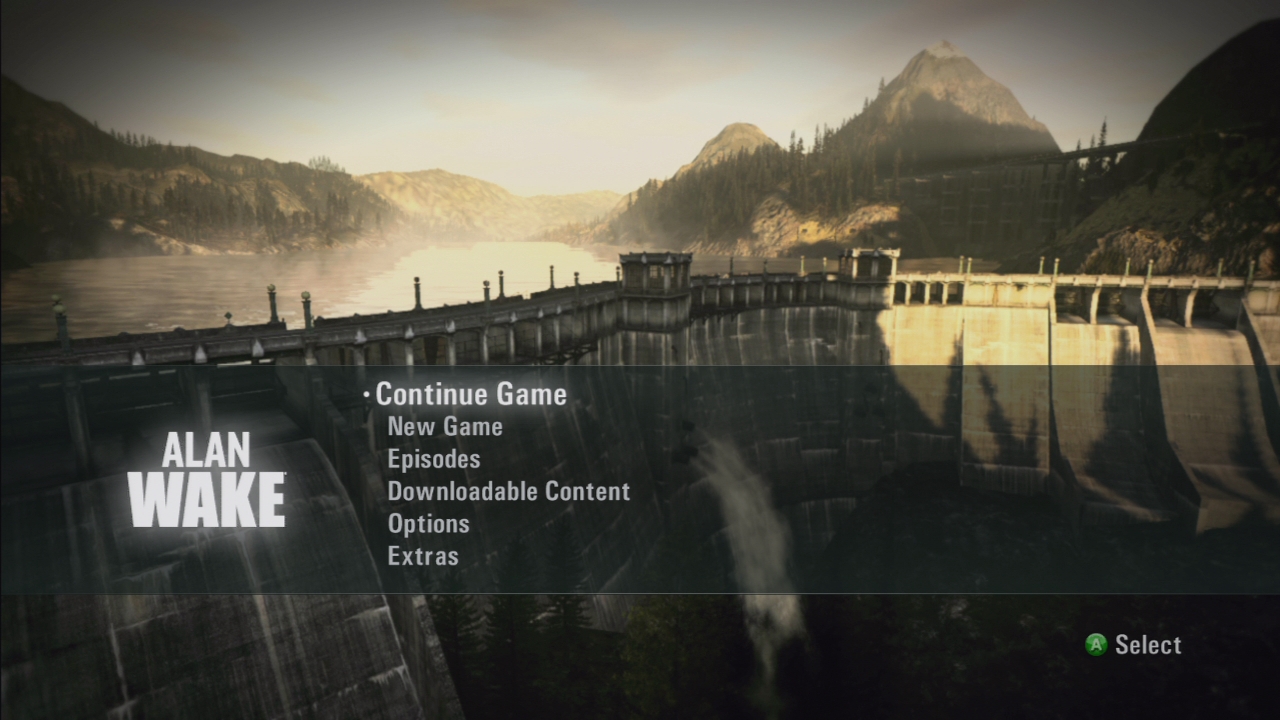
The Dam
You won’t be able to get into the dam the same way Barry and Sarah does. Some possessed objects will break through a gate giving you a new path. Destroy three giant cable rolls to move on. Once you climb over the fence you’ll find a Manuscript Page entitled, “Zane’s Shoebox.” Continue up the path to the top of the Dam. Some birds will try and injure you, but not too many. Once they’re dealt with climb the ladder to the top. At the top you’ll see a few Taken on one side of the bridge. Head to the other side of the bridge to control the search light. The search light lasts about 4 seconds boosted and then will over heat and take about 5 seconds to recharge. It can destroy taken easily. Once you destroy them all the Dark Presence will chase you. You’ll have to outrun it and dodge the pitfalls it creates. Run up and around the dam, when you get to an area where you have to climb down some stair case there will be a coffee thermos at the bottom on a shelf to your right. Once you reach the elevator you’ll be safe. At the bottom all you have to do to end Episode 5 is examine the door….Now onto the final episode!